Journey into H.265 (MKV) Using Handbrake

Hi All,

I’ve been a long time user of Plex and only now have begun to review the need for converting my Original DVDs down to something that can save space. As I’m quickly approaching the end of my 8TB drives capacity. I’ve just ordered another WD Red 8TB drive to act as the new drive, which’ll store the newly down converted rips.

My goal is reach 1:1 as much as possible when it comes to quality. My eyes are sharp, so my demands are quite high already. But based on time spent in my testing, I was able to confirm that H.265 will pretty much be my only option when it comes to getting 1:1 into reality. As H.264 is insufficient from a quality standpoint. (Note: DVD source is an issue, but I wanted to focus on 480i/480p DVDs. I’m still delving into BluRay.).

Given how helpful a lot of people have been on here, I wanted to throw in my research into this and show how compelling the results are. For my testing, I have 4 screenshots to help illustrate this point:

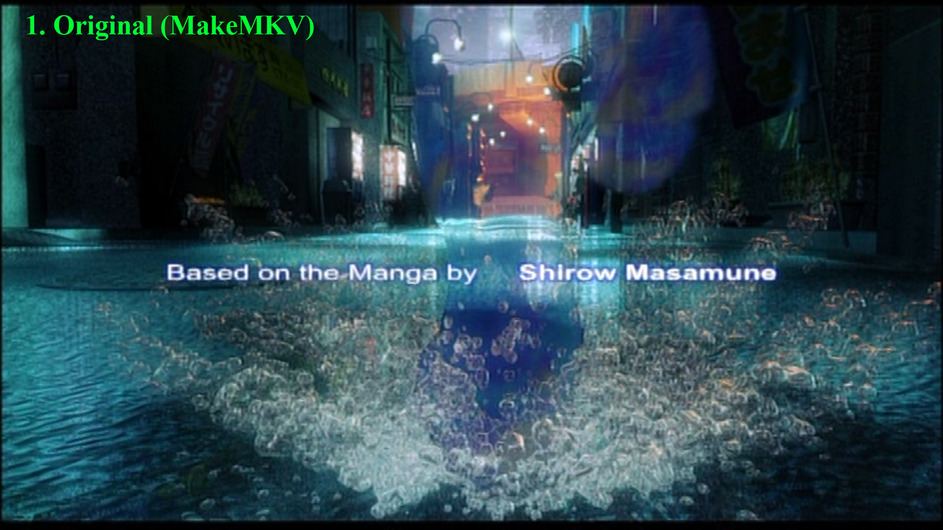
  • Original MakeMKV (DVD)
  • Handbrake Converted H.265 (Avg Bitrate 2200)
  • Handbrake Converted H.264 (Avg Bitrate 2200)(Intel Quick)
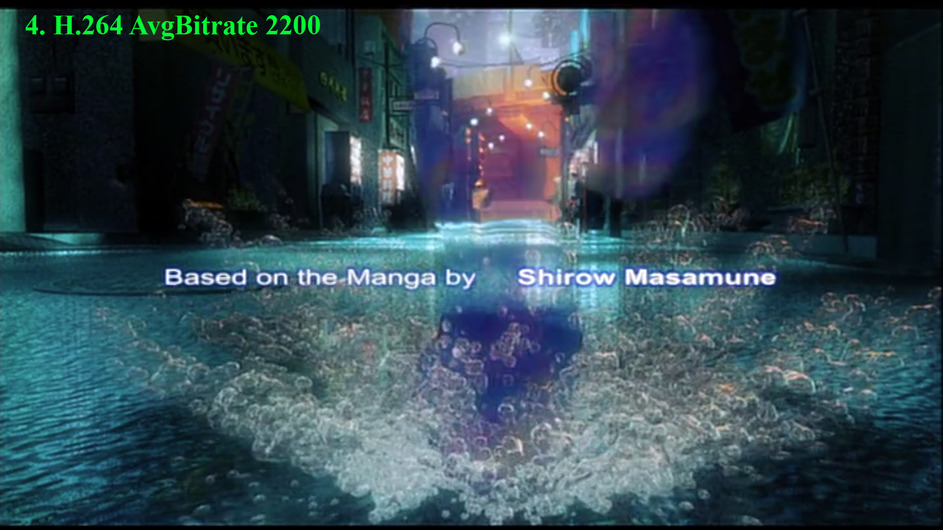
  • Handbrake Converted H.264 (Avg Birtate 2200)

Now before I go further into this, I want to add that Avg Bitrate tends to be a bigger issue when it comes to quality. I’m finding better (but slower) results with Constant Quality of 18-20. Constant offers better Quality Control, whereas Avg Bitrate offers better File Size stability. So I’ll likely use that in the end.


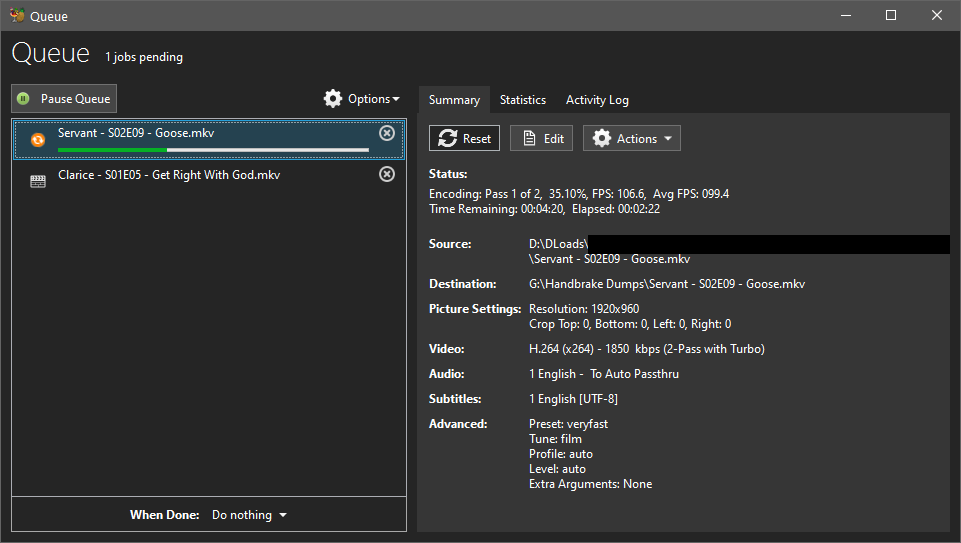
For the sake of testing, I’m using a DVD copy (that I own) of Ghost in the Shell SAC Season 1. I wanted to focus on the intro sequence which proved to be very useful in my testing. As the source material isn’t amazing, and conversions tend to make things worse. When you’re goal is 1:1 quality, this presented some unique challenges, and I’m still reviewing CLI scripts that I can carry over to make things even better. All conversions were written to and from an SSD, with “Slow” as the conversion option.

What immediately jumps out in these screenshots is her right foot, which obscures the background. In the Original (1), you can see the detail despite some issues with artifacts. In the H.265 version, you retain this with some caveats in quality. But once you begin to go into H.264, things get worse.

To my surprise, H.264 Intel Quick Sync (Animation) was clearly superior to H.264 on it’s own. Which was surprising, given how much faster I was able to export the file. By the time you get to the basic H.264 version, her foot almost completely obscures the background. With color aberrations impacting the quality/clarity of what’s behind her foot. This was extremely noticeable as a fan of the show, and even in other areas of the episode, this was clearly the case across the board. In the screenshots, you’ll notice H.264 even has some lost quality beside her transparent foot in small details, like the Red Sign on the left of the screenshot.

In brief, if your device(s) support H.265, this is pretty much a no-brainer if your approach is one of quality. I’m seeing many posts online state that H.264 is sufficient for quality, but for those that 1:1 it’s no contest.


For those that are interest, I can post some further research using the Constant Quality setting I’m working on once it finishes. In my quick tests, it seems to be superior. But time will tell.

Hope this is useful for those that are curious. I appreciate all the hard work others have done on this tedious and challenging subject!

1 Like

The only thing I would add is to make sure you encode with 10bit colour depth (not 8 bit) to decrease the probability of colour banding.

H265/HEVC 10bit is the best option IMO as it is high compression, lower loss than H264, as long as your hardware can display it.

1 Like

For DVDs, IMO - you’re shooting yourself in the foot using HEVC.

The first time you encode you knock the quality down and you can’t get it back using HEVC. The fact is, you can’t get it back - period.

I find for DVDs an AVC 2 Pass ABR at 1200Kbps with some Light Lapsharp filtering may actually look better than the original - and finish up 800% faster.

HEVC does it’s magic at HD Qualities - when you knock down the bit rate of an encode - as soon as you encode it - you still have something left to work with.

All my Opinion, of course - but having done this for decades a lot of those stark differences you’re seeing are in your mind.

Also - Hardware Encoding is INFERIOR to Software.
Quality comes a price.
How much quality you think you need is paid for with time and bit rate and very likely both. There are no shortcuts in encoding.

I’m lucky in that at my age I can’t see the difference in SD at 8500Kbps or 1200Kbps, but I’m not senile enough (yet) to think the 8500Kbps version is going to be smaller or faster in the making.

I am convinced for DVDs HEVC is a giant waste of time - time a limited resource I don’t wish to squander for an operation the benefits of which are invisible to me.

Also HEVC knocks about half of the possible Direct Play client pool out of the running. That’s important if you’d like to use your server for something else - and/or don’t want the Orange Spinner to be the only thing watched.

:wink:

3 Likes

Neat.

Still comparisons are hard to get frame-perfect, and different encoders will put keyframes in different places. I wonder if that contributes to the color difference in the x264 example - or do you see the color issues throughout? That’s not a typical x264 issue, I wonder what’s going on.

The biggest things I notice are how the x265 example preserves details in the smooth, dark areas, as well as contrast in the splashed water. It’s significantly better.

Yeah. Average Bitrate is only appropriate when there’s an output file size requirement. If the goal is “transparent” CQ is the right mode.

Average Bitrate can make poor choices about where to “spend” bits. Even in 2-pass mode, it can starve the video and then binge-spend during the credits.

Do you have a “modern” CPU? Early Quick Sync video quality was much worse at H.264 than x264. Today it’s much closer.

For H.265, Quick Sync (and NVENC) quality is neck and neck with x265. You can still get smaller files with x265, but like Juice says … you’re gonna wait for it.

This should be highly relevant to your content.

Agreed for H.265. It’s generally supported by clients. And non-intuitively, it also produces smaller files.

Keep sharing!

1 Like

The horror stories abound, but in every single test case at my house - on bitrate starved encodes of HD material under 1800Kbps Average Bit Rate was clearly superior to a Constant Quality encode at a similar file size. <—that’s the goal at my house.

Also, for my starved items (every dam one of them) the average bit rate is reported at the bit rate I set, but when Playing, Plex reads those Peaks and reports them as being 2 times+ the average.

It would appear an item I encoded at 1850Kbps, Plex sees as 5Mbps in the dashboard, indicating some action scenes required more bit rate - and got it. If Handbrake misses the goal a bit and gives me some great credits, I don’t mind.

I have NEVER - EVER seen poor video in an Average Bit Rate 2 Pass encode starved at the rates I encode. I have seen Horrific Constant Quality encodes when starved in a similar fashion.

Average Bit Rate isn’t the demon everyone thinks it is.
It’s working great at my house.

2 Likes

I’ll second that

1 Like

I agree that ABR (two pass) can deliver high quality.

I’d like to see an example of ABR showing higher quality than CRF. At equivalent file sizes they should be very similar, except the ABR is likely to be worse.

http://slhck.info/video/2017/03/01/rate-control.html

ABR adjusts quality to achieve a file size target. I’ve had significantly better luck with CRF personally, and am happy to set the quality when I’m not worried about file size.

2 Likes

Well, I don’t have to experiment to find out what method delivers what I want - and that is a file size I can count on, quality that satisfies 30 pairs of eyeballs aged 20 to 80 (the 20s to 50s being the children of the 80s) viewing on flatscreen sizes from 32" to 65" and NOT ONE of them has anything, but praises to sing about the video quality.

I encode 1080p AVC 2Pass at 1650Kbps to 1850Kbps - never more. The same bit rate I use for 265 though I’d tend to lean toward 1250-1650 for HEVC… 1850 for something I really care about (and that’s not this week’s The Walking Dead or Mr. Mayor).

You can try to get CRF to produce a file that size if you want to (about 700M per hour) - then you can Crucify me with the results - if you have any results you’d care to share.

I’m busy making material and watching what I’ve made along with everyone else in our little group of uninformed and delusional non-conformists. The Experiment Phase is over in my town and the townspeople are stupidly happy for some reason.

1 Like

Is that a bad thing, I have seen Juice’s work on a regular basis and it is Awesome. I live in a land down under and I can vouch for it’s quality remotely. No dumb kangaroo droppings in the background on cocaine, like a lot video I have witnessed. So please offer some proof of your wild statements.

1 Like

I don’t know about that, but I do know these two encodes will be done well within the hour and they’ll look 10X better than the 720 Crapcast is providing - and that’s why my guys would rather watch them on MyPlex than Crapcast… well, that and the fact the picmission isn’t interrupted every 7 minutes for 5 minutes of advertising.

All anyone in the pack would have to say is ‘your stuff looks like crap’ and I’d do something else. So far everyone seems content considering there is a stream running almost all the time and some one is apparently enjoying it.

1 Like

I’m glad you are happy with the settings you’re using. I’m not suggesting your video looks bad. At those bitrates I’m sure it’s fine.

When prioritizing specific file sizes, 2-pass ABR is appropriate. Hitting file size targets is the purpose of that mode.

OP is prioritizing quality, and I’m confirming their statement: When quality is the priority, CRF is the appropriate mode.

At equivalent final bitrates, quality is indistinguishable between the two modes, and bits are distributed very similarly within the file, with similar peaks and valleys. (Ignoring the “ballooning credits” issue.)

And CRF is 20% to 100% faster than 2-pass ABR. 2-pass ABR isn’t slower because it’s higher quality; it’s slower because of the time spent calculating the bitrate budget.

When I don’t need a specific file size, I’d rather easy-to-compress media be smaller if possible, and hard-to-compress media be larger if necessary for quality.

And because x265 is so slow, the increased speed is appreciated.

1 Like

Thank you everyone for your learnings on how to make this work! I’ve been toiling away, reading each person’s response before responding. As I didn’t really know what would work in the end.

Much to my dismay, I haven’t been able to find a resolution I want to retain permanently, since every setting creates some sort of downgrade. Whenever I watch something, I’ll notice some form of artifacting or color loss. I noticed greens in particular were slightly desaturated in Aliens compared to the original Make MKV pull. So I’ve been trying things out, but haven’t found the “sweet spot” of compression with quality.

One thing I’d like to add is all signs indicate this was taken at the exact same frame. I used VLC to enter the exact same timestamp, and beyond this, everything matches up. So frame differentials shouldn’t be an issue, given that I’m using the exact same timestamp. This is also with the same framerate export being used as well.

It sounds crazy, but a large reason behind this project has been to keep quality around 100% while reducing file size. The file size has become a bit of an issue, as I want to reduce HDD scanning. Along with making the streaming easier from my home connection (just had to upgrade to Gigabit, but upload is capped at 35mbps). Besides bandwidth/HDD bottlenecks, a side goal is to allow support for as many connections as possible (BluRay included).

If I find anything that hits the “sweet spot”, I’ll be sure to update the thread. I feel obsessed at this point! My wife’s eyes aren’t as good, and she’s beginning to wonder what “difference” I’m even talking about when it comes to all this work! :rofl:

I appreciate everyone’s perspectives! I’ll be releasing my BluRay settings soon. As I believe I finally found the sweet spot on that!

Cheers everyone!

1 Like

I feel ya man! Most people that watch with us hardly notice anything. But having worked for so long in media, I gotta hit that high mark!

For my BluRay, I definitely use 1080p. But since most of my DVDs are are much lower, I’m used to playing around with the resolution settings. I recently bought Tenet, and this film in particular became my testbed for my personal “Experiment Phase”. I’ll be sharing that stuff soon enough!

I appreciate you reaching out on this post!

BluRay testing of 1:1 quality:
This has been a months in the making project that I’ve been working on. One of the hardest aspects was reviewing the technical aspects of Handbrake Command-Line-Options (CLIs), and using the right ones that kept the quality exactly the same with file sizes reduced.

Before going further, please note that this is meant to serve as notes for those looking to keep the quality their blurays 1:1, so length of time for conversions is being treated as unimportant. If you have a beefy computer, you will see much faster times than I did using an old PC (specs below).

Here’s what I used:

  • Windows 10 Pro
  • Intel i5-4440 @3.10GHz
  • 8GB Ram
  • Intel HD Graphics 4600

The key to using a jack of all trades setting on Handbrake was to find all of the necessary levers to get from A to B in a high quality fashion. To date, these are the best settings I’ve found to date to ensure that everything is (to my eyes) exactly the same. With file size reduction being a secondary goal. For my testing purposes, I used MakeMKV to export the RAW bluray quality. Then converted it down using Handbrake.

I did not use UHD (4k) films, so the focus here is on 1080p. However, if you have black bars on the top & bottom, you will notice further significant drops in file size. As I did with Tenet (~36GBs > 11.7GBs), which was presented in Theatrical Widescreen (wider than 16:9). Also, if you limit the audio options, you’ll notice even further size decreases. Roughly speaking, if you kept everything, my conversions seem to reduce to around 56% of original file size on average. But when black bars and audio options were removed, I observed file sizes reaching under 1/3 of the original. Captain America Winter Soldier was another great example where I observed file size decreases. (32GBs > 7.2GBs). It’s also worth noting that I used Passthru for my audio options that were retained.

So what was key beyond the usual CBR and whatnot? CLIs! If you see below what I was able to achieve in a more detailed show from Mission Impossible Fallout, you can see that this shot is a a perfect example going from one to the other. One hint that I was on the right track was that both screenshots were not only looking the same, the screenshots even had the exact same file size from the exact same frame from the same movie.

MakeMKV - RAW Export

Handbrake Conversion - Customized Export Quality

Looking at the screenshots, you’ll ask yourself, “Are these really from two different video files?” YES!!! I literally thought I did this wrong the first two times, then re-did it a third time and named everything accordingly, just to be 100% sure I was looking at this correctly. I couldn’t even find any examples of color downgrades, or poor transitions from frame-to-frame in fast action scenes or shots involving motion blur. I can attest that fast action scenes and motion blur were easily the biggest issues I’ve had within my testing. As those scenes created the biggest downgrades in quality. The Tenet car chases in particular were noticeable with the settings set to lower values.

Critical Settings That Made This Work

  • Video Codec: H.265 10-bit
  • Framerate: Same As Source
  • CBR Quality: 18
  • 2-Pass Encoding: ON
  • Encoder Preset: Slower
  • Extra Options (CLI):
    • RC-Lookahead: 120
    • BFrames: 12
    • Ref: 6
    • AQ-Mode: 3

When using these CLI settings in unison with the remainder of required settings, I have yet to notice any issues in quality drops on any files converted (4 full conversions so far). The CLI settings were added to keep frame-to-frame transitions looking solid and exact from RAW source. And I can’t find any flaws with them, aside from the lengthy conversion times. How lengthy does it take though? 3-4 DAYS!!! Yes, that is pretty damn long. But my goal here is quality 1st, file size 2nd, and the settings here do not disappoint. Now bear in mind, I have yet to try these on a beefier machine, especially one where I can possibly flex some video card options. But this is what I’ve come to in my testing.

If you’re interested in trying these settings yourself, please check out the zip file of the Handbrake Settings. Which you can import into your Handbrake application install. If you come to even better options, I’m more than happy to try them out myself and see how much faster we can get these conversions going!

Hope this helps you in your conversions!

Handbrake File Download:
Handbrake BluRay Converison.zip (1.1 KB)

CLI Documentation Guide (VERY Technical):

Nice!

Tenet has scenes in multiple different aspect ratios. The Blu-ray includes portions that are 16:9. Christopher Nolan is notorious for this. Cropping shorter than 16:9 may remove picture/movie content.

Cropping all-black areas shouldn’t save a meaningful amount of space.

:+1:

CRF (Constant Rate Factor) isn’t CBR (Constant Bit Rate). It’s almost the opposite - it adjusts bitrate, as necessary, to achieve a target visual quality.

18 is a fairly high-quality setting. It’s probably not completely transparent. I’m almost always happy at 18 or 20.

This option isn’t relevant in CRF mode.

You might like this comparison of encoding size/time/preset. Encodings are a bit smaller, but a lot slower, beyond “medium”.

Why so large? I don’t think I’ve seen a value this large used, and I don’t I understand how it would impact the results.

I like aq-mode 3 better than the default (2) for most content. You might also like 0 if your focus is quality, but 3 should produce smaller files if you are happy with the results.

1 Like

Good catch on the CFR! I was in a rush documenting everything and didn’t realize that type (will edit shortly). I appreciate you pointing that out. I did notice that when I kept the remaining settings but dropped this to 20, there were some minor anomalies when it came to zoomed in picture quality. I’d say this gives you around 97%-99% quality. But variation depends on source fidelity and the other settings involved. That’s based on limited observations though. I used a high mark, and I’m slowly working my way down.

Regarding 2-Pass Encoding, I now see what you mean. As that was far better in a Variable Bitrate scenario relating to allocations. So I’ll definitely adjust that setting to OFF!

When it comes the Encoder Present and the research link you provided, I now want to play with the idea of dropping the same conversion to MEDIUM and see how it goes. Speed is great, but I’m curious if quality is impacted. I will find out!

As for RC-Lookahead being so high, I could still play with it more. But I was noticing issues when I went to 40. Fast action scenes were noticeable in 60FPS sources, so I figured I’d go crazy on this particular setting and ensure quality. Since I started using it 120, I haven’t noticed any issues. So I decided to keep it. I’ll definitely trying some tests out and see where I can improve speed while retaining quality on this. As it def has an impact. But do you personally have a recommended sweet spot? I’m curious what others use for RC Lookahead.

AQ-Mode 3 is definitely a solid choice. It’s been giving me great file sizes and 1:1 quality of video. So I’ll think I’ll be sticking to it. It’s been very reliable and doesn’t appear to be a weak point by any means!

I appreciate you reaching out @Volts! I’m definitely taking your advice to heart and will go back to the drawing board for further testing. I think I might try Tenet again, since that file is so damn huge. :rofl:

1 Like

The intention of the presets is to make time vs. space trade-offs, rather than quality. The slower presets use more techniques to try to make it smaller, but since it’s all “lossy” compression, each technique has different visual impact.

Table of what’s added to each preset:

There are (small) visual quality differences between the presets, but it’s not a simple “slower is better”. The fastest presets look great, and they’re very fast. They’re just not very small.

If you want to hardcore nerd-out, here’s your path. :slight_smile:

On that page there’s an example output table, showing different VMAF/SSIM/PSNR quality scores for different presets.

Thanks for the info. No, I haven’t played with this much at all. More to learn. :slight_smile:

rc-lookahead is one of the settings that the presets adjust, but even Placebo is “only” 60.

Interstellar is similarly fun. Most of the movie is slow/dark/talking-head scenes. They don’t need a ton of bitrate, but still need care to avoid blocking/banding. And then it switches to 16:9/IMAX and it’s FULL SCREEN BRIGHT WATER MOTION.

2 Likes

This topic was automatically closed 90 days after the last reply. New replies are no longer allowed.