As written in the [HDR Metadata Passthrough] - Plex HTPC for Windows ] thread, I just recently looked into refining the HDMI timings for the 23.976 mode resulting in a 0 dropped frame experience with Plex HTPC
In the following thread, I will guide you through how to achieve this on your end!
CAVE: Everything you do is at your own risk!
What you need:
- mpc-hc → https://github.com/clsid2/mpc-hc
- madvr → https://www.videohelp.com/software/madVR
- (latest madvr beta) → not necessarily needed but recommended
- CRU-> https://www.monitortests.com/forum/Thread-Custom-Resolution-Utility-CRU
- latest drivers for your GPU
- Windows 10/11
- A long movie file with the framerate we want to tweak. (e.g 2160p23 file for tweaking 2160p23 playback)
- time → depends, 2h - 4h
- https://www.monitortests.com/pixelclock.php
First step - What are the current numbers?:
-
- Install mpc-hc through the installer.
-
- Install madvr
-
2.1 Do so by downloading the madVR09217.zip file and extract it to a save place.
-
2.2 Download the latest madvr beta - as of writing “madVRhdrMeasure206.zip” - extract the archive and copy the files into the madvr dir. It will ask you, if you want to overwrite the files, hit yes
-
2.3 If not already in the madvr dir, change into that dir and open the install.bat as administrator, madvr is now installed. As seen in the following two pictures
-
- Open mpc-hc, open the settings, and go to “Playback” - “Output”
Change the video renderer to madvr, as seen in the picture.
- Open mpc-hc, open the settings, and go to “Playback” - “Output”
-
- Click on “Settings” and then on “Edit Settings”


-
- Now we need to tweak some madvr settings - All the settings we change are just for tweaking the framerate and reducing further processing, after tweaking the frame rate feel free to change the madvr settings as you like
-
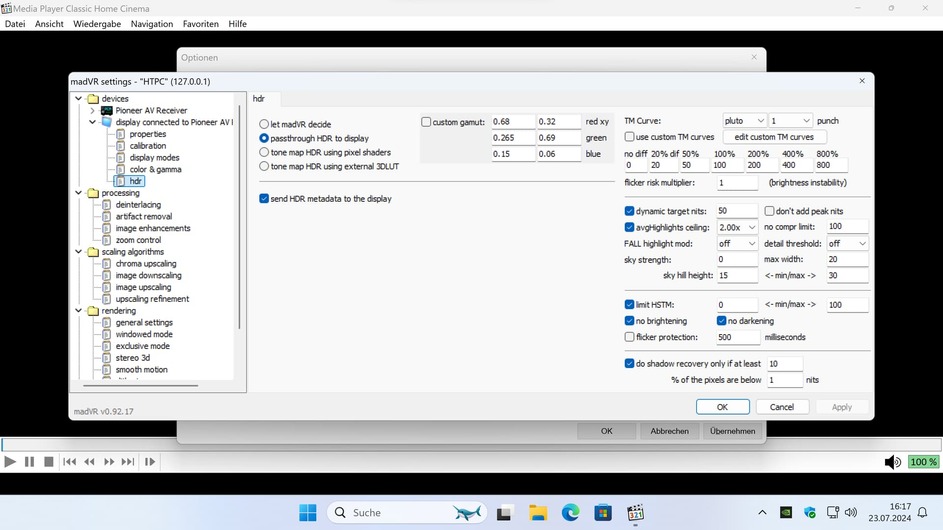
5.1 Change HDR to “passthrough HDR to display” -
![Screenshot 2024-07-23 161357|690x388] -
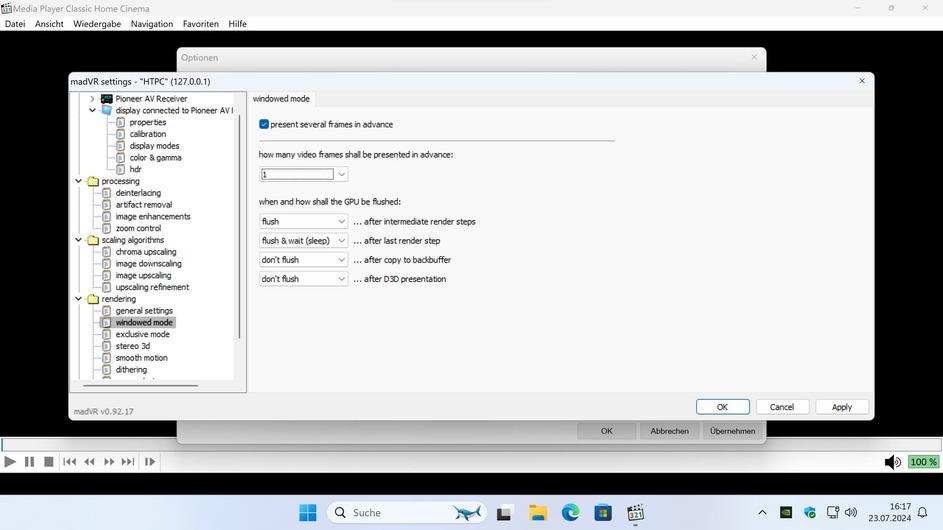
5.2 This is needed on Nvidia GPUs, 23p may be jerky if its not set to 1
-
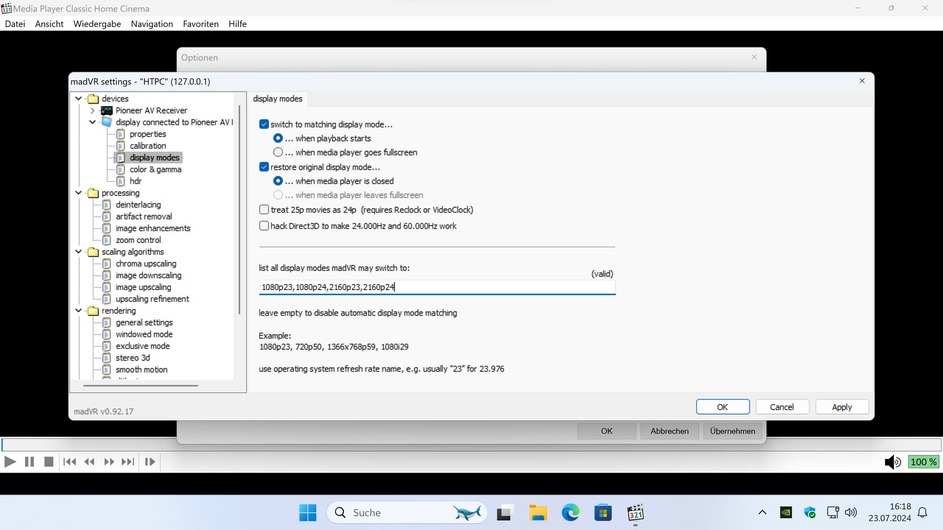
5.3 Enable switching and add the resolutions we want to test, this allows madvr to auto-change to these modes. In my case, I want to test 1080p23,1080p24,2160p23 and 2160p24 modes
Don’t forget to hit apply after changing all the settings!
-
- Change the audio settings in mpc-hc - We want to tweak the frame rate with audio passthrough on, with only outputting PCM the frame times are different, as PCM can be adjusted on the fly - that is not possible with passthrough audio.
-
6.1 Open the mpc-hc again
-
6.2 Go to “Internal Filters” and click on “Audio Decoder” in the lower right, Allow all “Bitstreaming formats” - as seen in the picture. Hit apply and ok. Close the window.

Now we are ready to get the initial numbers.
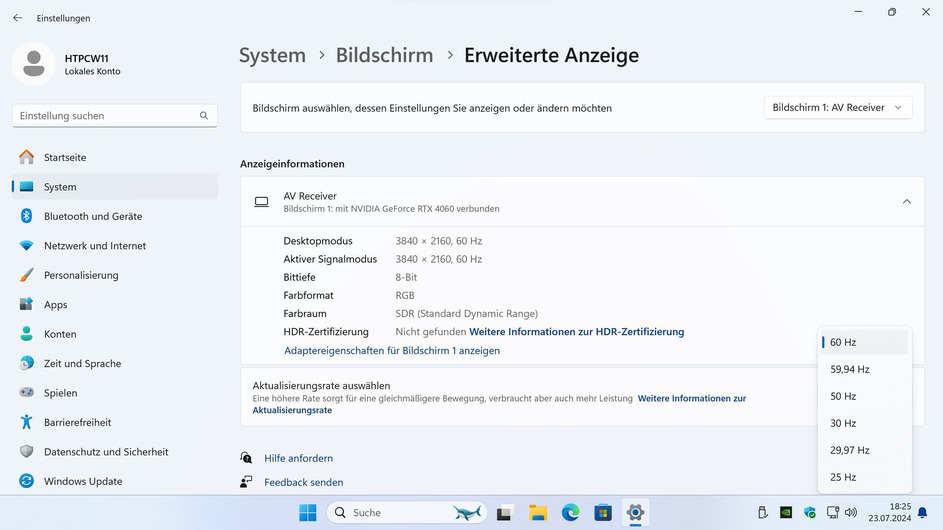
=> Open the sample movie file in mpc-hc and change to fullscreen mode. The TV/display should now switch into the correct mode.
Hit CTRL+J to open the statistics of madvr.
Let it run for at least 5 minutes, the longer you wait the better the results.

In the upper left, you can see the line “1 frame drop every 47.36 minutes”
That’s the current state. This number is also valid for Plex HTPC playback.
Now we want to change it!
First, we need to delete the original 23 and 24p resolutions.
Open CRU and delete them. Follow the next pictures to do so
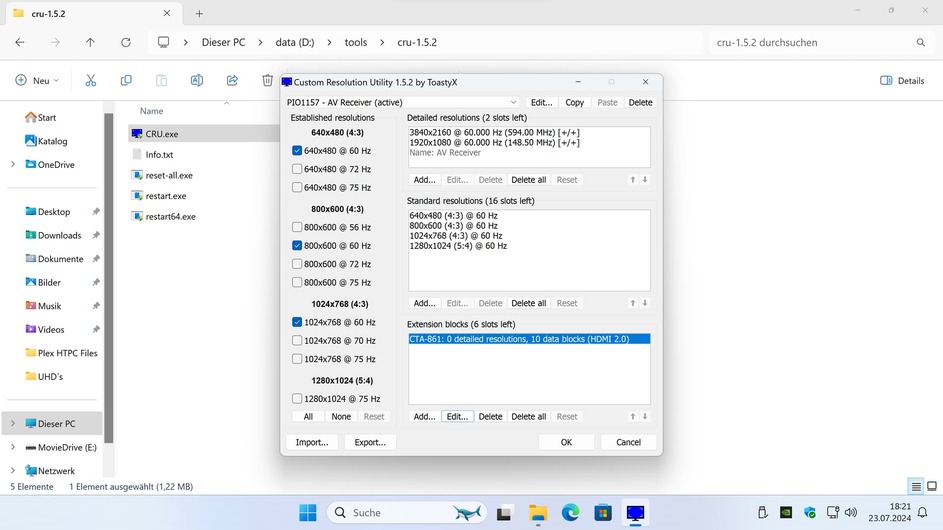


=> Reboot the PC after doing so!
After reboot, check if the modifications worked

The 23 and 24p modes are now missing!
Next, we want to create new 23p and 24p modes.
Open the webpage https://www.monitortests.com/pixelclock.php
and put something like this in.

Now head over to CRU, we need to add entries where we can put in the values from above.
Under “Extension Block” click on “Add…”
Select Type: “DisplayID 2.0”
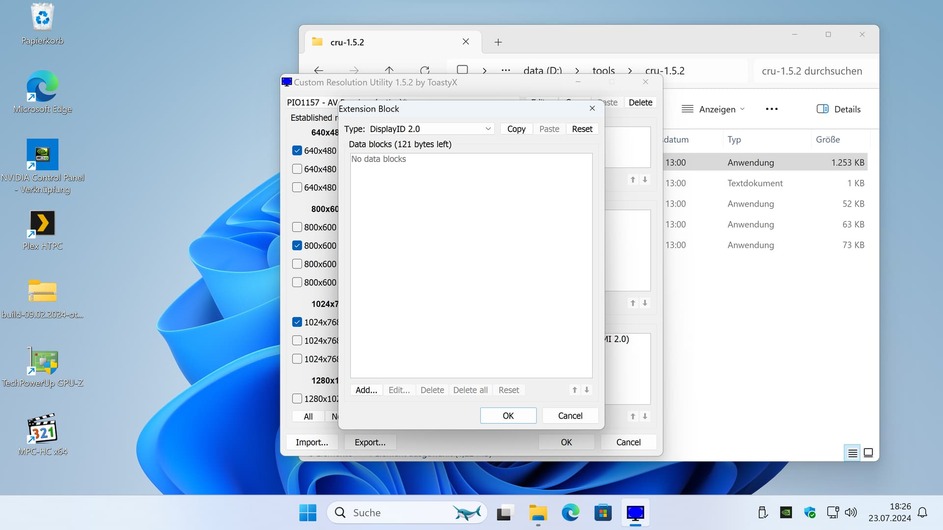
Click “Detailed resolution” OK

Now click on “Add:”

This window will open =>

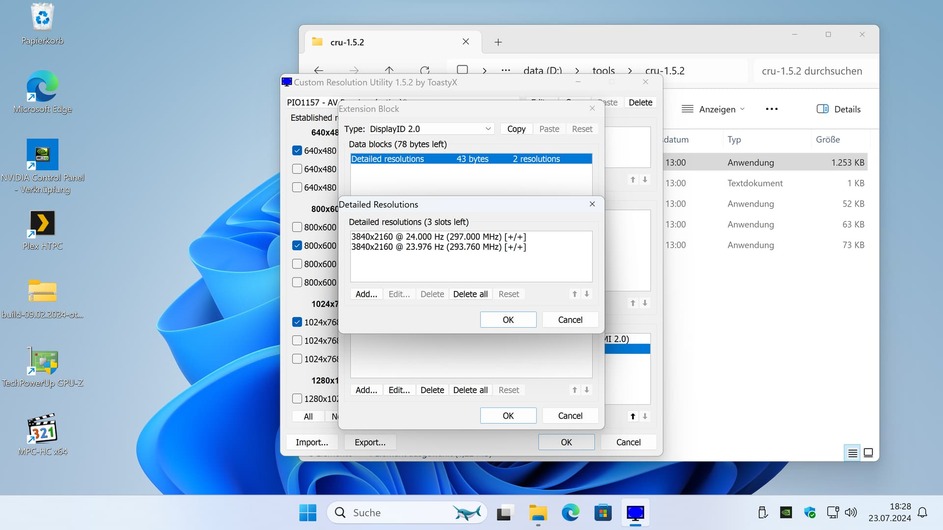
Firstly change it to “Automatic HDTV”

Change the Refresh rate to 23.976 (or the refresh rate you want to add)
This is necessary as it automatically calculates the correct Front porch value…
Then change it to manual and click on “Total:” and put in the values from the “Pixel Clock calculator” and under Frequency click on “Pixel clock:” also put in the value from the “Pixel Clock calculator”
=> For example


Hit OK and do the same for 24p.
It should look like this then =>
Reboot the system after making all the changes.
You now should have a 23p and 24p mode again. Note, that the modes are not visible inside the Nvidia control panel, they only show up under the Windows settings (and every other app…)
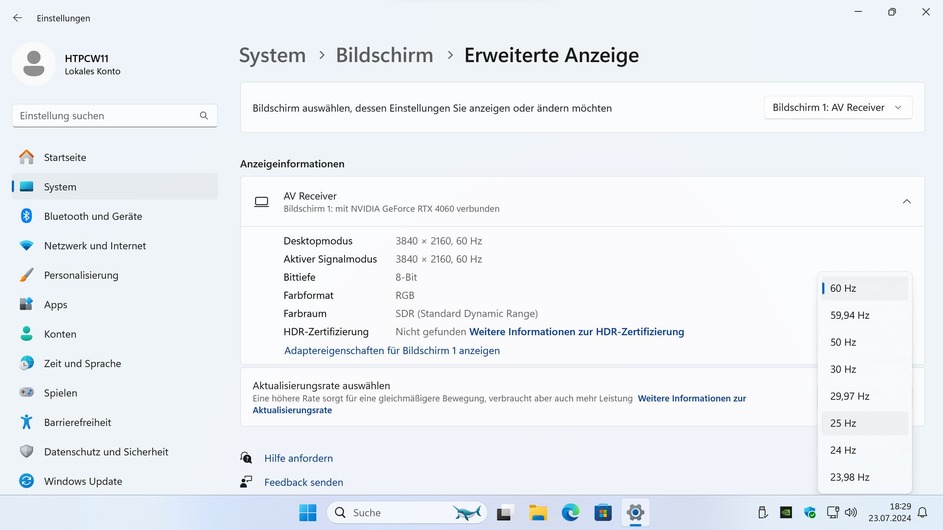
Now open mpc-hc again, play a file, and let it run for at least 5 minutes.
Check the value that says “1 frame drop every xxxxx minutes”
If its better, tweak it even further or leave it at the new value. It could also be worse.
If you want to tweak it even further, open CRU again and edit the newly created modes again with different values from the “Pixel Clock Calculator” . Try again and again until you are happy with the results! It should be minimally 4h without dropped frames.
On my system its around 14h…

Now you should have perfect 24p playback in Plex HTPC!
Note:
On my end, the OSD of the AVR was broken after I changed the HDMI timings. The audio controls were completely in a wrong spot, I disabled the OSD…
Also note, that with every driver update the resolutions could be lost, so save them somewhere! => In CRU simply click on “export” and save them somewhere safe.
Version: Edit #2 28/07/2024

