Adding media files - Creating library sections
When the server has finished the main first-run internal task it does before adding media (this can take a bit depending on speed of the NAS), it will display this page.

We’re now ready to start adding media “sections” (movies, tv, music, and photos)
Click “Add Library”
Select the type of Library* (Movies, TV, Music, Photos, or “Other Video” (Home Video)

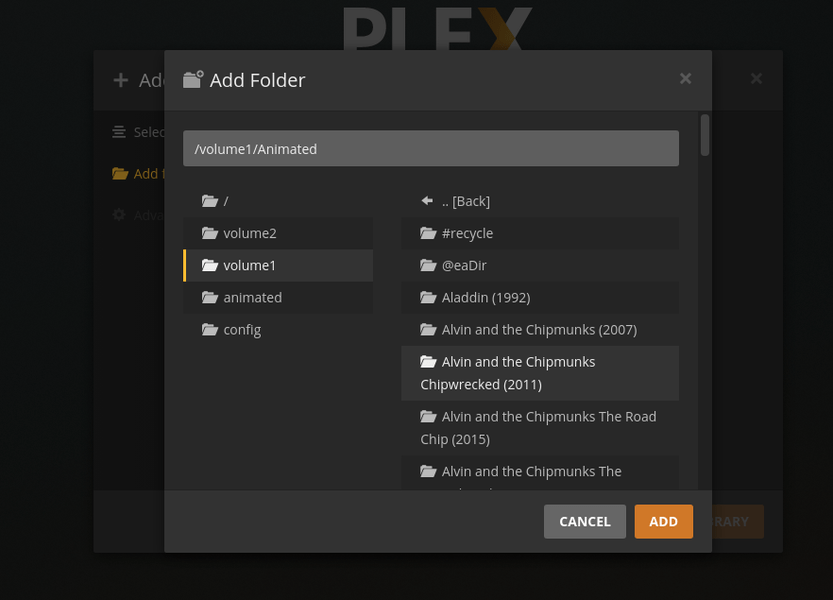
Setting up the Animated Movies library section (this example)
Using the left panel selector,
-
Select the volume the share is located on (usually volume1)
-
See the list of shares in the right pane.
-
Click “Animated”
-
If the permissions for Plex are set correctly. All your content will show in the right pane just as it does below.
-
Add the Movies section while we’re here.

This is all we want to create for now so click “NEXT”.

On the pages which follow, the wizard will ask a few other configurations about how you want PMS to operate initially. Feel free to choose as you wish. Everything can be changed later without ill effect.
When we’re done with the Wizard and happy with these initial settings, click 'DONE"

Watching the media populate
At this point, we return to the left panel and find our server.
This DS418 has two media shares defined (Animated Movies & Moves)

In this screenshot, Click “Animated Movies” (left pane) then “Library” (top panel)
We now can watch PMS scan our media and retrieve the metadata (orangle spinning circles)

Note: Linux does not store names in alphabetical order. It is normal to see media scanned in a random manner. What it’s really doing is scanning in the order the media was added to the folder.