You can “remux” a file to add/remove audio or subtitle tracks, as well as set language information for them. This can be useful to ensure your content has language information specified so that Plex automatically selects the correct tracks for you.
Remuxing, in our context, refers to the process of changing the “container” format used for a given file. For example from MP4 to MKV or from AVI to MKV. It also allows adding or removing of content streams as needed. Remuxing differs from Transcoding in that remuxing a file simply repackages the existing streams while transcoding actually creates new ones from a source. The crucial difference is that if “lossy” codecs are used, transcoding causes the quality to deteriorate (however small the difference might be).
Therefore remuxing is in most cases preferable to transcoding/re-encoding, to preserve the full quality of the source file.
Using MKVToolNix
In most cases, you can use a tool such as MKVToolNix with a GUI frontend to make things easier.
Download MKVToolNix
The MKVToolNix program lets you create MKV files from various media streams. Downloading MKVToolNix:
- MKVToolNix Downloads Page: https://mkvtoolnix.download/downloads.html
Remux your file to MKV
-
Open the MKVToolNix application (it may show up as an “mkvmerge” executable on some operating systems):

-
Find and Add files accordingly:
-
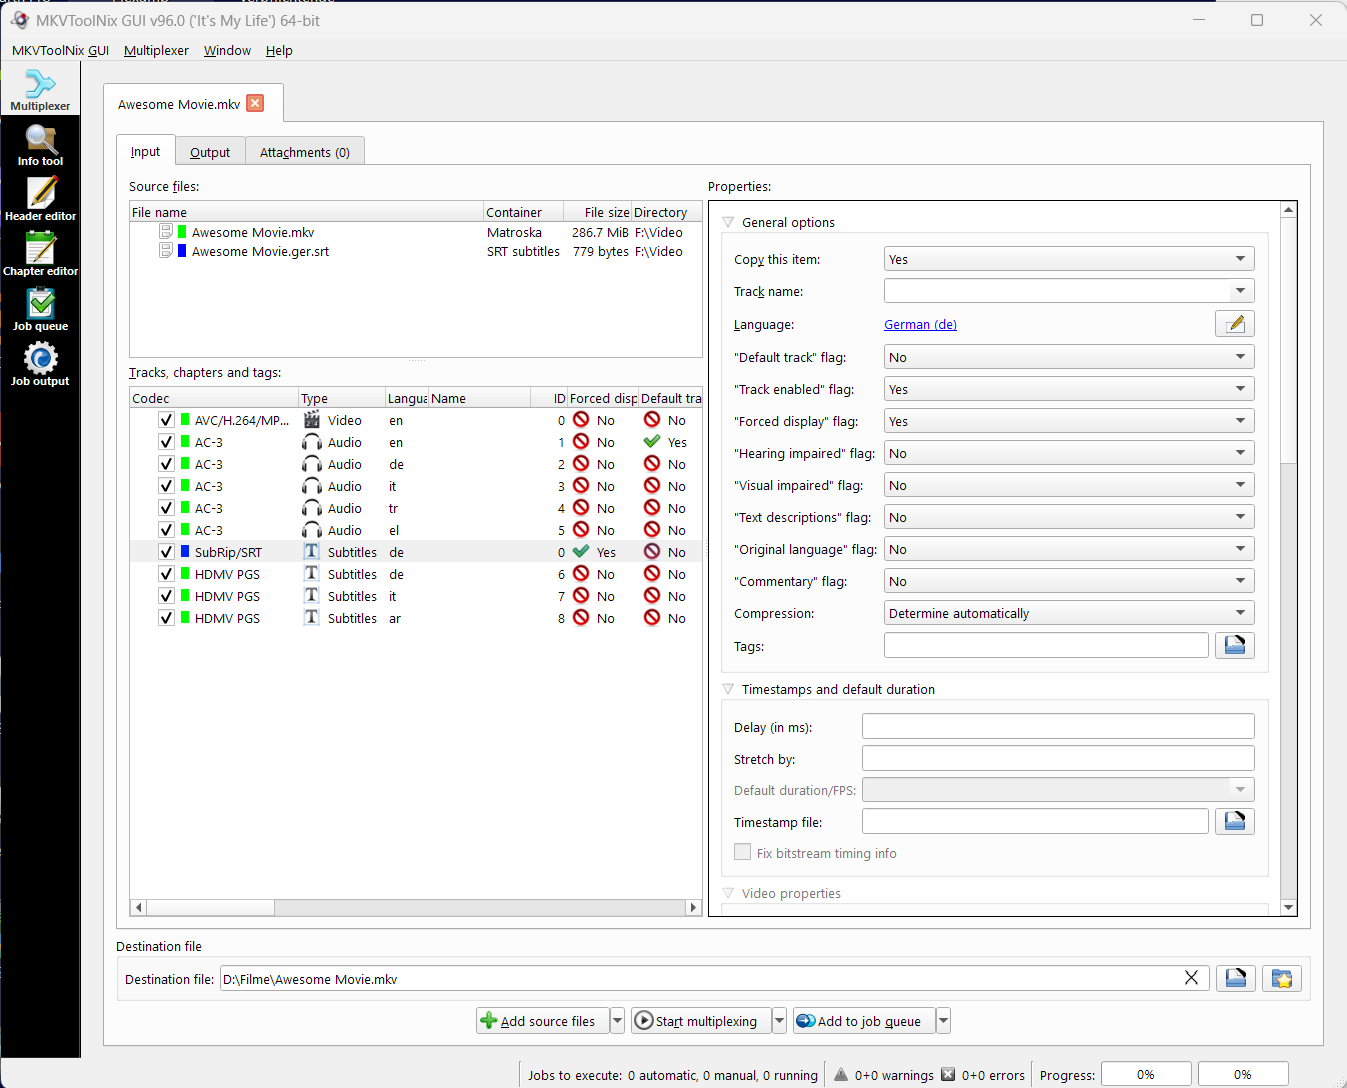
Select and Edit Tracks accordingly:
(In this example, the names of the audio tracks have been removed, since Plex clients alreadu display the channel count and codec type anyway. A new subtitle SRT file has also been added, set as a “forced” subtitle track with a language specified.) -
Make sure you are saving the file in the right place & Start Multiplexing.


Plex will use the language set for the track, as well as “Forced” flag attributes to determine which audio and subtitle track is selected for playback by default. Some tips:
- Be sure to always select/set the appropriate language for each audio and subtitle track.
- Plex selects audio & subtitle tracks first based on the language tags and the language preferences of the Plex account currently signed in to the client. If language preferences are not set for that account, or the files don’t have language tags in them, it will use the first track (which appears topmost in MKVtoolnix).
- The “forced” flag is only relevant for subtitles. Despite its name, it does not force a subtitle to always get displayed. Instead, it’s an indication of this subtitle’s type. Forced subtitles are more correctly described as “subtitles for additional spoken languages and/or signs and text on screen” (e.g. showing the translation for dialog in an alien language in a Star Wars movie).
Plex will select them automatically, if the subtitle mode in a user’s language preferences is set to “Shown with Foreign Audio”. On the other hand, “Always enabled” will prefer to select the regular/full dialogs type of subtitles instead. - Remember that a track without a language tag appears as “Undefined/Unknown” in Plex and will not be treated as default English.
For a full and complete reference guide to MKVToolNix please see the included readme file when you installed the program or refer to the official documentation.
Related Page: MKVToolnix GUI Documentation
Using FFmpeg
It’s also possible to use FFmpeg to remux content from the command line. It’s a very powerful tool, but making the most use of it can be complicated for new users. In this case, though, it’s generally easy to use it for a simple remux.
Download FFmpeg
The FFmpeg website has links to downloads for multiple operating systems or you could even get the source code and build from source.
Related Page: FFmpeg Downloads
Remux your File to MKV
To use FFmpeg, you’ll call the binary from the command line and give it various arguments or parameters to tell it what to do. In our case, we’re going to copy all streams in the file and output to an MKV container, so the command will generally look like:
/path/to/ffmpeg -i /path/to/inputfile.mp4 -c copy -map 0 /path/to/outputfile.mkv
Note that the order of things is important here, so be sure to follow it. For example on macOS, if we wanted to remux a Christmas_Party_2014.mp4 file on our desktop over to MKV in our user’s “Movies” directory, it might look something like:
/Applications/ffmpeg -i ~/Desktop/Christmas_Party_2014.mp4 -c copy -map 0 ~/Movies/Christmas_Party_2014.mkv
We encourage you to refer to the FFmpeg documentation if you have questions or need assistance.
Related Page: FFmpeg Documentation