FAQ 23: Moving large amounts of data on Synology via GUI.
This FAQ is intended to be used in conjunction with this How-To
This FAQ is to help you get away from using the default Synology Video, Music, and Movie shares. Use of their shares will always conflict with Plex when Video station and/or Audio Station is installed. This FAQ helps you store your media in a neutral location both can work with.
This FAQ is provided AS-IS, without liability for any data loss (I hate legal clauses but necessary) so be sure you know what you’re doing as it is a “Full Power” tool.
While it does seem like a lot of work, it is only in the first-time setup.
This procedure is set to move ONE block of data at a time. If you need to move multiple blocks around, you will need run it multiple times. Keeping it this simplistic avoid mass damage from occurring.
When moving large quantities of items, you’ll quickly find File Station takes far longer “preparing” than you do to make the edits.
WARNING:
Before proceeding:
-
If the source volume and the destination volume are different, make absolutely certain you have enough free space on the destination volume.
-
If you are moving to a new share, be certain to create the new share in Control Panel - Shared Folders first. Pay attention to the capitalization you use.
-
If source and destination volumes are the same, there are no disk space concerns.
a. If moving across volumes, you will need to make certain enough space exists on the new destination volume. ( This process does a copy-then-delete after method ) -
Make 100% certain there are no folder or file names which begin with a period (DOT)
.character. The dot character (period) in Linux is considered a hidden folder or file and will be ignored (left behind).
How To Do This:
-
Control Panel
-
Task Scheduler
-
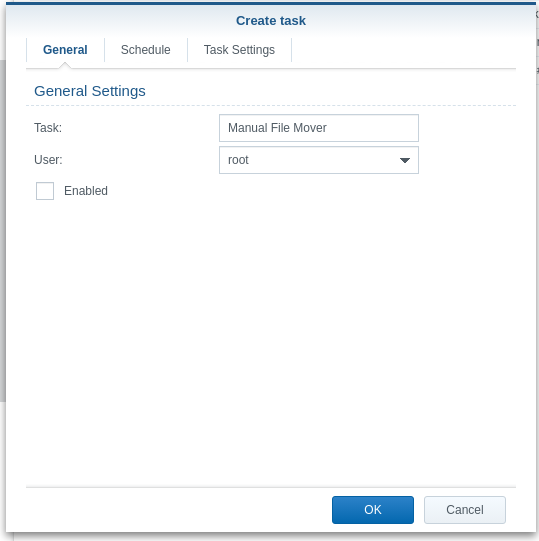
Create a scheduled task which is a User-defined Script
-
It is to run as user
root. DO NOT “Enable” it.
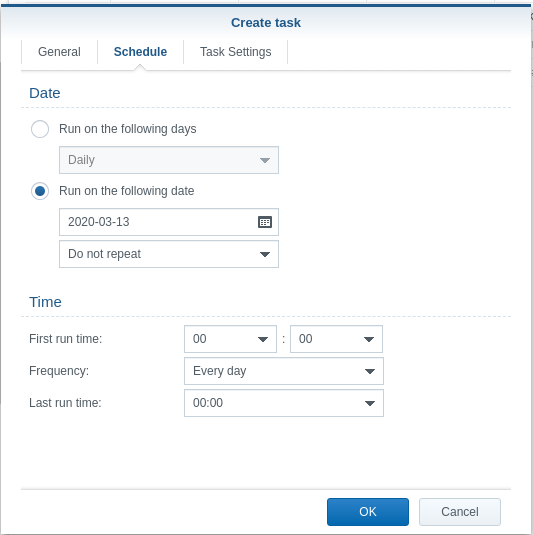
-
Define it to run on the schedule below (which satisfied the GUI only)
-
Under “Settings” copy and paste this text VERBATIM

#!/bin/sh
#
# Define the source and destination share names (Capital letters are critical)
Source="/volume1/ChuckSource-Test"
Destination="/volume1/ChuckDestination-Test"
#
# It is important that the Destination exist before Enabling and Running this script
# If not created,  the script will error.

# Check before moving
if [ ! -d "$Source" ]; then
  echo \"$Source\" is not a directory or does not exist.
  exit 1
fi
if [ ! -d "$Destination" ]; then
  echo \"$Destination\" is not a directory or does not exist.
  exit 1
fi

# Safe to move so do it.
mv -f "$Source"/* "$Destination"
- If you want the script output emailed to you, enter your email address
- When complete, click “OK” to save it.
The script is now ready to edit for your use.
How To Use
In Plex:
- Go to the Library section
- Add the new shared folder (Destination) to the list of monitored folders)
- Save it
- Let it scan but come up empty
- Go to Settings - Server - Library
a. Disable Automatic Scan
b. Disable “Empty Trash after every scan” - Now perform the move below
Performing the move
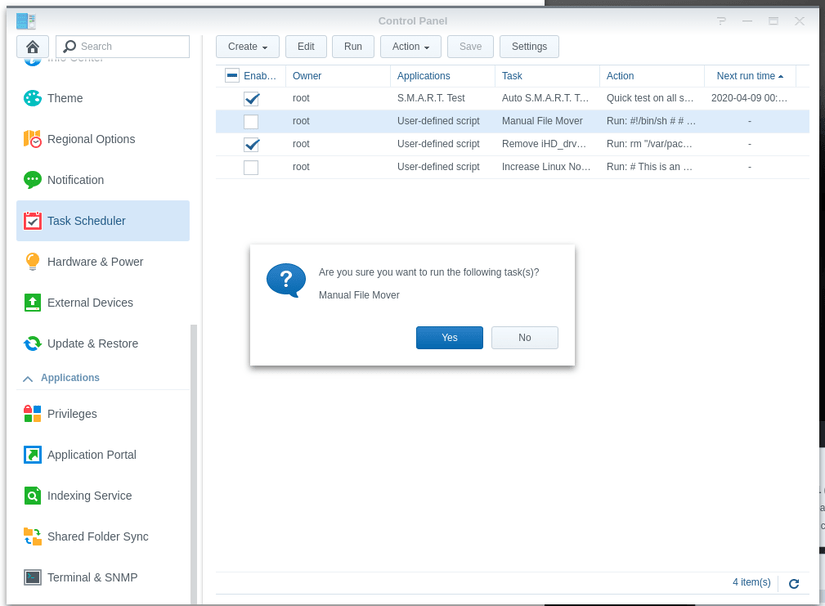
- In the Control Panel - Schedule Tasks
- Highlight the script and click “EDIT”
- Go to “Settings”
- Carefully edit the source and destination directory (folder) names to match your source and new destination shared folders.
- Save (OK) the changes
- Advise: Open FileStation so you can monitor the progress (use Refresh)
- Now “RUN” the script.
- After it’s done, inspect
–Before–
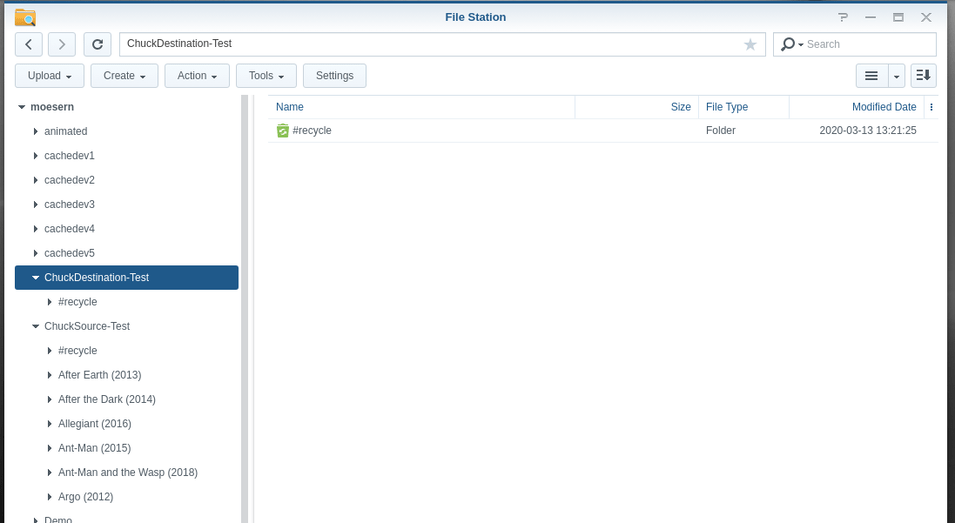
–After–

- Return to Plex
- Go to the Library section you are moving the data for.
- Invoke a “Scan Files”
- Observe as Plex finds the files in their new location (did you give Plex permission?)
- When all media is accounted for (no red trash can), EDIT the shared folder list again and remove the old media location.
- Scan again
You’re nearly done.
- When all media moves have been completed
- Settings - Server - Library
- Enable Scan my library automatically (if you disabled it)
- Enable “Empty Trash” again
- Lastly perform these steps to clean the whole library section
a. Scan Files
b . Empty Trash
c. Clean Bundles
d. Optimize Database