Creating Shared Folders
If you don’t have existing shared folders for your media, follow these steps
**If you already have your media stored how you want it, you can skip this step
DSM 7 NOTICE:
On DSM 7, “System Internal User” PlexMediaServer is used (change ‘Local User’ → ‘System Internal User’) when granting shared folder permissions.
- Open Control Panel
- Click Shared Folder → Click “Create” (at the top)
- Give it a name
- Decide if you want the Recycle Bin on or off. The recycle bin catches all deleted files. If you forget, you’ll think you’re losing space VERY quickly.
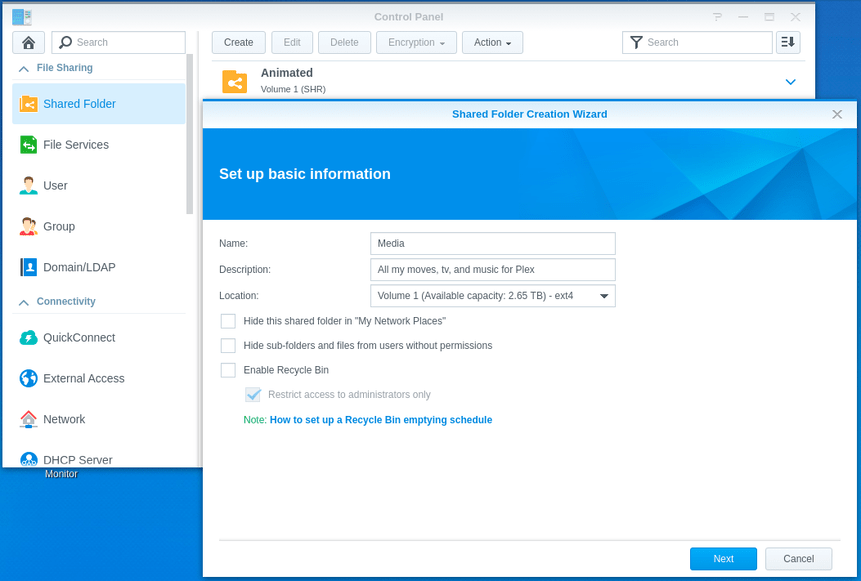
Next is the Encryption option. This is a personal choice.
BE FOREWARNED: If you activate this, Plex can’t see your media until you unlock it

**Confirm what DSM is about to create. You can go “Back” if you need.

Grant permission for Plex while creating the share

Granting Plex access to your media after creating the share(s).
We’re going to perform this step for each shared folder you’ve created (which is holding your media files) .
If you just created the Shared Folders then you’ll have already done this step and can skip over this part.
If not, we will grant user “plex” permission to “Read-Only” for now.
Synology provides us two different methods.
Use This form of “edit” (right click the share name)

Or this form of “edit”. This form is probably easier for most
(Highlight the share you want to edit. Click the ‘EDIT’ button at the top)
Check the “Read-only” box for “Plex”/“PlexMediaServer” on the “Permissions” tab. Then click “OK”.

Depending on how we decided to store our movies, We might need to make folders for them in our new “MyMedia” share.
- Open FileStation
- Open the new share name - Select it from the left panel.
- In the right panel – Right-Click – Create Folder

We’re done creating our shared folder and granting access to Plex.