In DSM 7, the Plex shared folder is 100% free for you to use as you see fit.
PMS itself will reside in the new PlexMediaServer shared folder.
Since you want to otherwise start fresh,
Open FileStation,
Go into the Plex shared folder,
If you don’t have any media anywhere under Library – delete Library.
This will remove ALL of Plex’s metadata (a full wipe of the PMS server data so you can start fresh)
If you currently have media anywhere else in the Plex share, you can delete the “Plex” shared folder after you’re done reorganizing.
I can helpYou have downloaded the ARM version of the Plex, however, as shown in your Info above, you have an Intel Atom CPU. You need to download the x86 64Bit Intel version.
Last year, when I upgrade from DSM6 to DSM7, I ran the Beta Plex App available through the Package Center. At this moment I did not know about the official guidelines and procedure to upgrade described here DSM 7 - Plex Media Server - Release Info & Migration instructions
That said, everything was working fine with the Package Center App.
Since the data breach, I changed my password, and after that, cannot claim my server from the plex web player.
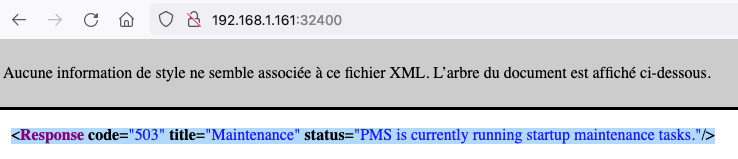
So I choose to remove my Beta install and go for the official one. I’ve followed all the migration process without any problem, but now, when I try to launch plex, I get this error.
Response code=“503” title=“Maintenance” status=“PMS is currently running startup maintenance tasks.”
Response code 503 is “Not Available”.
– It was just released by the server team.
– I don’t know if the apps have all caught up with that or not
Upgrading from 1.21.0.3744 to current is a wise move. It might take time.
– Your server internal data will be moved from the Beta location to it’s final release home in the new "PlexMediaServer shared folder
– Be patient while this completes else it will make a mess to clean up manually at the SSH command line level
Lastly, Recovering from the breech is now straight forward
a. Uninstall the package with “Uninstall Only ; Keep” option
b. Reinstall the same SPK file you downloaded from Plex.tv
c. Select the “Install using Plex Claim Token” radio button
d. Click “Get Plex Claim Token”
e. A new browser tab will open with claim token. COPY it
f. Return to the installer menu,
g. PASTE the token in the small box (Looks like this)
Thanks @ChuckPa ! You were right, the app needed time to start properly, it works like a charm this morning.
I’ve also claim the server as you suggest and everything works now. Thanks for such reactivity !
@ChuckPa thank you for all the work done in these threads! I read through almost all 1000 replies and found the answers I needed to solve my NAS >> NAS move I was doing from DSM6 > DSM7.
Hey @ChuckPa,
I’ve got something I’m sure you will know right away. I recently switched to a new router, went through your help guide of uninstalling and reinstalling to get a claim code. Have done that, and it still give me “not authorized”.
I’ve been bit by this one myself more times than I can count.
“Not Authorized” in Plex context happens most frequently when it can’t get to plex.tv and communicate. (DNS lookup / Gateway address incorrect for either or both )
The other thing which happens from this reset: The browser still holds all the old credentals – EVEN IF – you open a new Incognito tab.
Most browsers don’t completely clear their contents with new tabs.
Try: