28. Using Docker for HW trancode & Tone Mapping - How To
WARNING:
This technique is no longer required as of PMS 1.29.1.6240.
PMS 1.29.1.6240 and above installs the needed drivers automatically upon first use
You may now remove the PMS container and image.
=================================================================
OBSOLETE
This How-To (FAQ) will demonstrate how to setup PMS, with HW transcoding and tonemapping support.
Two different methods are presented here
– First method is run via Scheduled Tasks which creates the Tone Mapping configuration
– Second method is for those NAS platforms (ARM based) which do not have HW transcoding capability.
Prerequisite - Get the PlexMediaServer UID/GID information
Get the UID/GID values from DSM 7 for use with PLEX_UID & PLEX_GID
- Create a Scheduled Task - User script
- Run once
- Email you the output
- username
adminis fine.

- In the email, you’ll see lines which looks like this:
chuck@ds418:~$ id PlexMediaServer
uid=297536(PlexMediaServer) gid=297536(PlexMediaServer) groups=297536(PlexMediaServer),937(videodriver)
chuck@ds418:~$
- The first number (297536) is the value for
PLEX_UIDorPUID. - The second number (297536) is the value for
PLEX_GIDorPGID. - The numbers shown here may not match your system. Use only those which come from your system only.
Method 1 - Hardware Transcoding + Tone Mapping
- A
pms-dockercontainer - Which uses the DSM 7 (
/PlexMediaServer/AppDatastructure) shared folders. - And is fully interoperative & non-destructive of the Native app. (you can run either either as you wish.)
A. Create the HW transcoding container
-
Create a Scheduled Task , User-Script, run as root which creates the new container. Again, have it email you the results to confirm successful creation.
-
Substitute your actual values in the environment variables where appropriate.
Use “ID” and “GID” pulled from your system PLEX_UID & PLEX_GID
(You may use PUID & PGID for if you wish)
- Task “Settings” are:
– Change/volume1/PlexMediaserverto the appropriate volume only if your PlexMediaServer shared folder isn’t on the default/volume1
docker run \
-d \
--name Plex \
--network=host \
-e TZ="EST" \
-e LANG="en_US.UTF-8" \
-e PUID=297536 \
-e PGID=297536 \
-e PLEX_UID=297536 \
-e PLEX_GID=297536 \
-h dockerplex \
-v /volume1/PlexMediaServer/AppData:"/config/Library/Application Support" \
-v /volume1/PlexMediaServer/AppData/tmp:/tmp \
-v /volume1/PlexMediaServer/AppData/tmp:/transcode \
-v /volume1:/volume1 \
-v /volume2:/volume2 \
--device=/dev/dri:/dev/dri \
plexinc/pms-docker:plexpass

# Set to automatically restart unless stopped
docker update --restart=unless-stopped Plex
B. Run the task to create the container
- Run the scheduled task
- Check your email to confirm success
- Open the Docker app and verify you now have a Docker container.
===========================
Method 2 - Create your new container (ARM processors - No HW transcoding)
A. Define the container in the Docker GUI
- Download the pms-inc image
- Create the container using these specific settings
-
Volume map:
/PlexMediaServer/AppData→/config/Library/Application Support -
Volume map:
/PlexMediaServer/AppData/tmp→/transcode
-
Environment variable:
PLEX_UIDand/orPUID= value we obtained above -
Envirohttps://forums.plex.tv/t/important-information-about-plex-for-smart-tvs-after-september-30-2021/746506nment variable:
PLEX_GIDand/orPGID= value we obtained above -
Modify variable:
CHANGE_CONFIG_DIR_OWNERSHIPtofalse


B. Network
- Set your network. You want to use the Host network - NOT bridged - NOT NAT.
C. Apply the settings to create the container
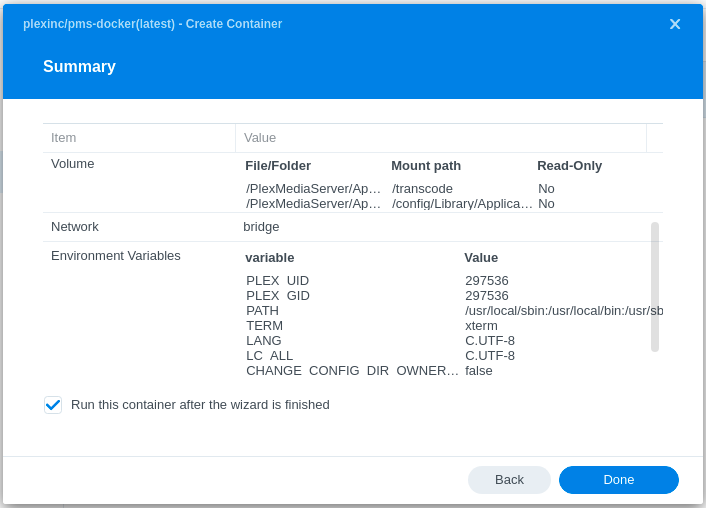
)
D. Done
That’s it. DSM 7 using the native data without change.
With this configuration, you can stop docker, start native and continue without change.