Plexamp 4.6.1 - Playback
Download: https://plexamp.com/
Blog: https://medium.com/plexlabs/plexamp-v3-9af3b10063b4
Release Notes: Plexamp Release Notes - #18 by elan
Due to character limit I have split this how-to into two parts. Part one focuses on playback and part two focuses on settings.
Please note: Work in progress!
Part two - Settings can be found here:
[How To] Plexamp 4.6.1 - Settings - Plex Labs - Plex Forum
Global
Home
-
It is currently not possible to translate the user interface of Plexamp.
-
Home Screen sections can be visible, hidden, and re-ordered via the home screen settings (
Settings > Appearance > Home Screen). -
The following recommended hubs can now be added to the home screen: On This Day, Top Albums from … (period), More in … (genre), Most Played in … (month), More from … (record label), Artists on Tour
-
Mixes for you - Carefully curated mixes just for you, based on your recent plays.
-
Recent Plays / History - The difference between Recent Plays and History:
- ‘History’ displays each single track that was played.
- ‘Recent Plays’ displays how playback was started.
If you tapped Play on an artist, you will see one item with the Artist name. If you started a Radio, Mix or playlist, you will see one items bearing the name of this Radio, Mix or playlist.
-
Stations/Radio - At this point one would hope that as a Plex user you know what radios are… and if not, no worries! Radios are like smart shuffles, but not to be confused with true shuffles, and ESPECIALLy not to be confused with the Truffle Shuffle. Let’s see what SimonXCIV has to say: Radios play a station of tracks based on a few key factors:
- Popularity from last.fm
- Your star ratings
- When a track was last played (suppresses recently heard tracks, to keep radios feeling fresh)
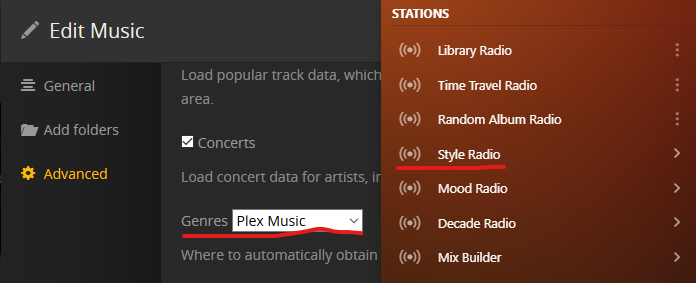
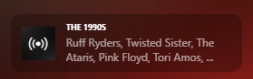
On the Home tab you are presented with preset Stations, these include: Library Radio, Time Travel Radio, Random Album Radio, Genre/Style Radio, Mood Radio, Decade Radio, Artist Mix Builder, Album Mix Builder and Sonic Adventure. Artist radios can be initiated from artist view. Please see Library section for more details. There are several settings that drive stations, these can be found
Settings > Playback > Radio. Please see Settings page for more information.- If you set the “Genres” preference in the properties of your music library to “Embedded Tags” (PMS:
Music Library > Edit > Advanced > Genres:, the ‘Style Radio’ in Plexamp will turn into ‘Genre Radio’- Style Radio
- Genre Radio
- Style Radio
- If you turn on Sonic Analysis in the properties on your music library and perform a Sonic scan, Sonically features, like Sonic Adventure, will become available. For more about Sonic Analysis please visit: Sonic Analysis for Music | Plex Support


Library
-
Browse Options - Browse your library how you want… and yes even by folders.
-
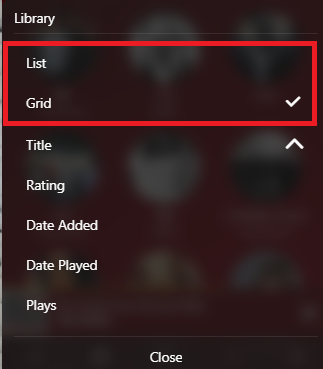
View - The view can be changed in many of the library lists by pressing on the three dots in the top right corner, and selecting
ListorGrid
- List
- Grid
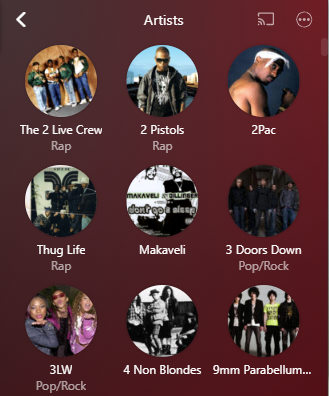
On Desktop whether in List or Grid view, pressing the Artists picture will initiate a shuffle of that artist. On mobile navigation into the artist will occur.
Long pressing or right clicking will provide a pop context menu for selected artist
While viewing an Album the Artist name can be selected to navigate to the Artist.
- List
-
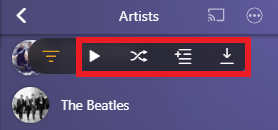
The Cerebral menu can be seen at the top of certain sections within the library browser. The menu provides the following actions to the currently viewed section: Filter, Play, Shuffle, Add to Playlist, Download. It is available in: Library: Arists, Albums, Compilations, Tracks, Artist Collections > [Collection], Genres > [Genre], Styles > [Style], Moods > [Mood], Record Labels > [Label] … (items in [brackets] are selected items within section.
-
Play / Shuffle Entire section - available towards the top of player in several library sections, you can either play or shuffle play the current section.

-
Add to Playlist - Add entire section to a playlist or create a new playlist.

-
Download - Downloads section to device. Is limited by space, and duration.

-
Filters - Ever use filters on Plex Web? If you have then you know just how powerful they can be to listen to exactly what you want. Well… filters are now available in Plexamp. And if you haven’t, give them a try.
Available in Artists, Albums, and Tracks browsing categories. Indicated by the funnel filter icon.
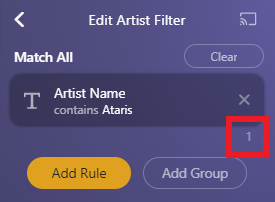
When a filter is applied the filter icon will glow orange. Filters will continue to be enabled unless explicitly cleared.
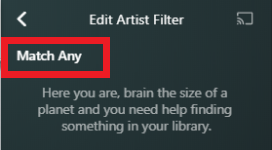
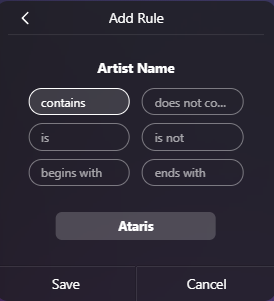
Rules can be added in “AND | OR” logic. The Match* label can be toggled to be Match All or Match Any. In the Match All, rules are applied in a hierarchy from the top down.
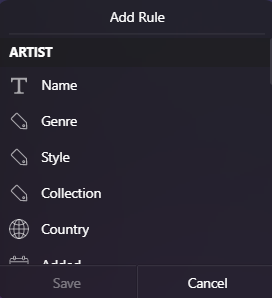
When Add Rule is selected several filter types are available for the three Browsing Categories: Artist, Album, Track. All category filters are available and can be applied regardless of the current browsing state. These can be viewed by scrolling up and down in the Add Rule dialog.
When filters are applied the amount of items returned are visible in the lower right hand corner of each rule.
Rules can be grouped together with the Add Group button. These can also be combined with individual rules to be more refined. e.g. Return ANY artist from Japan, Australia, or England… Then from those results only return Heavy Metal.
After applying all desired rules, results can be viewed by navigating back to browsing (< icon top left corner). All filtered items can then be browsed through as normal, or they can be Played, shuffled, Added to or create new playlist, or downloaded.
-
-
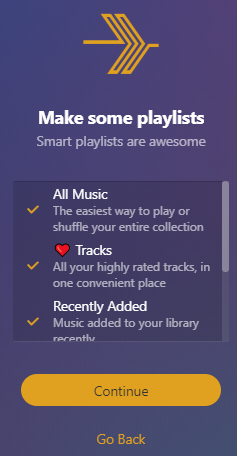
Playlists - When browsing playlists you might notice a few playlists that you did not create. What’s going on? Who created these? Well… Plex did. These are called smartplaylists, and they can also be created by you.
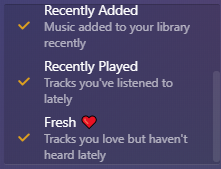
- Smart Playlists - Beginning with 3.2 Plexamp can auto create smart playlists, some specific to the users listening habits. These include: All Music, Fresh
 , Tracks, Recently Added, and Recently Played
These can be viewed in the recent playlists section from the hometab, or in the Library Tab. If they are not present the user needs to sign out and back into Plexamp. Upon signing in and selecting the default Music library the user will be presented with which playlists to create
These playlists are conveniently pushed to the server so they can also be accessed on all devices. The descriptions are self-explanatory but i’ll do my best to fill in the gaps. - All Music - The one simple way to shuffle your entire library. 'Nuff said.
- Fresh - Tracks you love but haven’t heard lately, any 3 star and above tracks that you haven’t listened to in awhile.
- Tracks - All your highly rated tracks, in one convenient place, typically three star and above
- Smart Playlists - Beginning with 3.2 Plexamp can auto create smart playlists, some specific to the users listening habits. These include: All Music, Fresh
-
Folders - All your music is carefully curated by you into specific folders. You throw caution to the wind and throw everything into decades folders (80’s, 90’s, 2000’s), or specific time of your life (Summer trip to Albuquerque). Whatever the reason, you can browse how the music is stored with Folders.


Search
-
Search Bar Focus - Selecting the Search Tab at the bottom will change over to the Search screen. Upon first display Aural Fixations and Recent Searches will be displayed while the search bar is at the top. To begin searching, clicking in the search box will change focus to the search box along with a cursor (and keyboard popup if on mobile/touch). If you don’t want to be bothered having to click IN the search box, simply click/select the search tab at the BOTTOM again and focus will change to the search box.
-
Aural Fixations - Fixations.. of sorts. These settings directly affect Aural Fixations which can be accessed in the Search tab. See settings for more
Settings > Appearance
-
Recent Searches - Displays your recent searches, I don’t know how to make it more detailed than that
 . To clear your search history, click on the three dots and select remove all.

Downloads
- Download… - Items can be downloaded to the local device. These items can then be played when access to the internet/server is not readily available, but also are played when ‘Prefer Downloaded Media’ is set to Always… or you know.. whenever you want. Downloading content can only be done to a max of 24 hours, and a Minimum of 30 minutes. Any Playlists that are 3hours or less will automatically download without prompt for duration. Any items that are downloaded can be accessed in the Downloads tab.
- Download settings are configured in
Settings > Downloads. see settings section for full description - Smart Playlists will refresh with new content if refresh setting is enabled.
- Downloaded content can be browsed like Library view.
- Playlists are downloaded in the order they currently exist. e.g. if a Playlist containing over 5 hours of content has items in alphabetical order A-Z, and a download of 1 hour occurs. Items will download beginning with ‘A’ until 1 hour of content is downloaded. That means it’s possible items later in the list (X, Y, Z) will not download.
- Tracks cannot be download from Tidal.
- Downloaded content cannot be cast to devices.
- Added At and Group view can be toggled from the overflow menu (click on three dots).
- Added At View
- Group View
- Added At View
- Download settings are configured in


Now Playing / Playing Music
-
Remove items from the current play queue, by swiping the item to the left, then tapping on ‘Remove’
(you need to do the same “swiping” movement with your mouse on desktop platforms)
-
ReOrder Tracks - Several screens/lists allow tracks to be reordered. This can be done by long pressing/clicking on desired track to be moved. Once track becomes a darker transparent grey, simply drag up or down and let go when in place. Reordering availability: Play Queue, small Playlists… (currently limited to dumb playlists with less than 100 tracks)
- Example. During Playback
Note the darker transparent color
- Example. During Playback
-
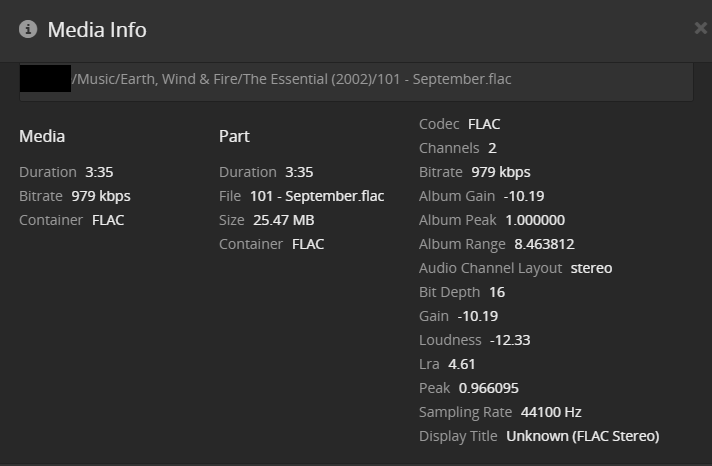
SoundPrint - The SoundPrint seen in PlexAmp is determined by the analysis that the PMS does on each audio file. If the SoundPrint happens to NOT be visible, it’s usually most likely that the analysis has NOT taken place, mostly due to newly added material. Typically extensive media analysis takes place during maintenance period (overnight), unless setting is turned off. This can also be determined by going to Plex web, navigating to song in question, selecting three dots and choosing Get Info. A deep media analysis can be forced on single items, please see Deep Media Analysis in the Technical section below.
- No Analysis -

- Analsis Complete -

- No Analysis -
-
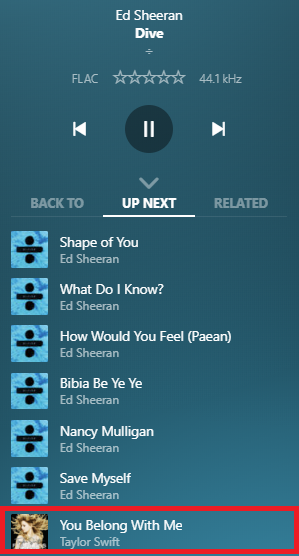
AutoPlay - What’s better than getting the party started? How about keeping the party going! Autoplay ensures your music keeps on going when your queue is up. If enabled (
Settings > Playback > Autoplaysee settings for more info) an autoplay card will display at the bottom of the current queue when nearing the end. Cards can be cycled through for various options and Plexamp will remember what you chose for the nextime. To cycle through the options horizontal swipe/scroll (desktop) left or right (for illustrated example see Related section below).-
Available Options: Next Album, Silence, Artists Radio, Similar Artists, Decades Radio, Library Radio
-
autoplay card will display nearing the end of a queue
-
Horizontal swipe/scroll to view other options


-
When the queue is on the second to last track autoplay will populate the queue with selected choice (here Next Album)
-
-
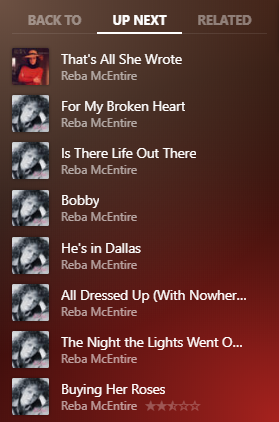
Related - Like the currently playing track? Want more like it? navigate to Related, see available similar tracks, click on
(+)Plus button. This adds to the END of the play queue.
If you like to see MORE related than the current list simply press the
Morebutton. Once more is selected and list refreshes, the original tracks can be loaded by pressingReset.
It just keeps getting better… do you like a related artist and want to see more suggested tracks? Swipe left to view more tracks, any and all can be added to the queue.
-
Show Lyrics - Clicking on the Artist name or Track title in the player will also allow you to enable the Lyrics display, if the track has lyrics available. Lyrics are nothing new to Plex, and this functionality is extended from the other apps. For more information: https://support.plex.tv/articles/215238778-automatic-lyrics-from-lyricfind/
Some tracks will have interactive lyrics where as the track plays the current line will highlight. These type of lyrics allow you to scroll and click on an line and Plexamp will jump to that place in the song.
-
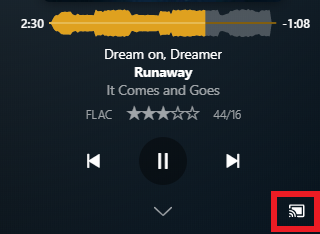
Casting - Cast music to available playback devices. Icons are available at the top right of most tabs, or bottom right in the now playing UI.
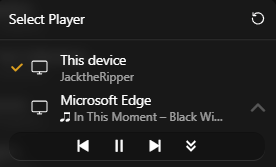
Once tapped/pressed a pop up menu will display all available playback devices. When another device is selected the current device will continue to display playback and display a glowing cast icon.
Pressing the cast icon again will display a checkmark next to the item being cast too, along withDISCONNECTat the top. Volume can be controlled via the volume slider. SelectingDISCONNECTwill continue playback on the cast device and free the current device for separate playback. However, the cast device can still be controlled via the sub navigation menu that is now available. Pressing the double down chevron in the sub navigation menu will terminate playback on the cast device and continue playback onThis device.
- Due to restrictions by Google, casting from Windows cannot be performed. Mainly Google devices will not be seen in available cast devices.
- Downloaded items cannot be cast, but they can be cast and played from the server.
-
Sleep Timer - Need music while you doze off? or how about for a short 15 minute cleaning spree? But also want your music to pause on it’s own, then sleep timer just might be the thing for you. Available in the now playing popup context menu, sleep timer allows music to be paused after a set time, with available 5 minute increments and end of track interval.
Once activated the sleep timer will display the remaining minutes , as well as a glowing moon icon. Time can be substracted or added using the minus(-)and plus(+)buttons in five minute increments. Timer can be canceled by selectingOff. Tracks will pause in the middle of playing. Sleep Timer pauses the current play queue, this allows the queue to remain if continuing play is desired VS a hard stop that would clear the current play queue.


-
VOLUME - I’ve seen it asked plenty of times so i’m going to include this here juuuuust incase anybody missed it. Control the volume of PLEXAMP ALONE by pressing the Cast icon and BOOM! VOLUME!
Ok ok let’s make things easier, turn on Show Volume Control in settings (Settings > Player > Show Volume Control), to have volume in the playblack menu.
-
Repeat - Can’t get enough of the extended version of “In A Gadda Da Vida”? Can’t get enough of the extended version of “In A Gadda Da Vida”? Just tap repeat. Able to repeat current queue, or a single track until the end of time!!
- OFF

- Repeat All

- Repeat One

- OFF
-
Skip to Next Album - If items are added to the queue while playing an album, the currently playing album can be skipped by long pressing the next button.
-
STOP Music / Clear Queue - When items are loaded into queue, whether music is currently playing or not, Long pressing the Play/Pause button will stop any playing music and clear the queue.


Windows/Desktop
While Playing an item/currently playing
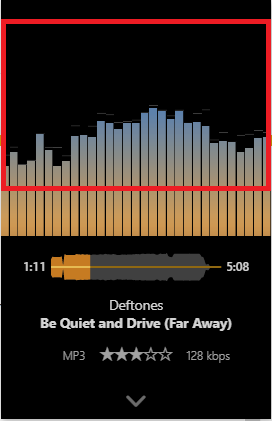
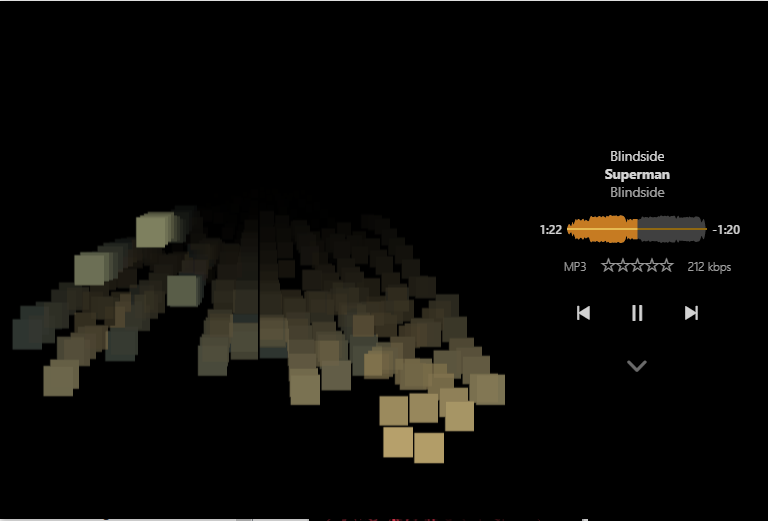
- The image/graphics can be toggled between album art or visualizer by simply clicking in the graphics area above where the play buttons appear. When the play buttons are visible (see resizing below), clicking ANYWHERE in the graphic will toggle between album art and visualizer.
- The visualizer can be changed by right clicking in the image area (either album art displayed or visualizer), and selecting the preferred visualizer. The options can be scrolled through with a mouse wheel.
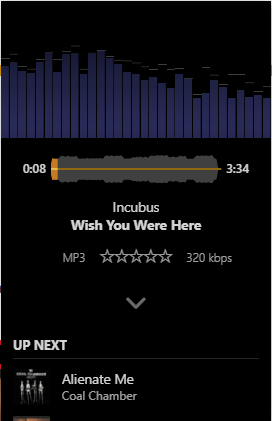
- Up Next/current queue can be seen by simply scrolling down with the scroll wheel, DO NOT CLICK ON THE DOWN ARROW.. tempting but don’t, that’ll take you to the main screen… unless that’s what you want.
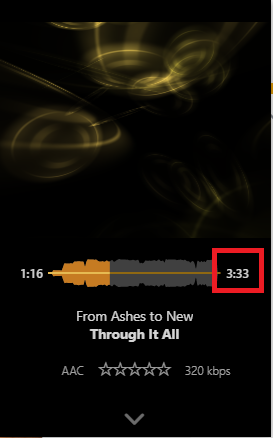
- Time left/song length can be toggled by clicking on the END time
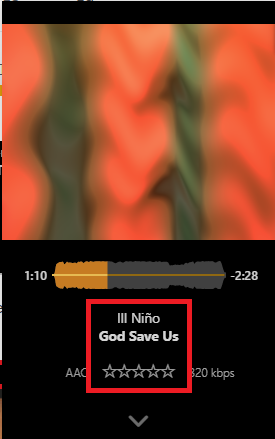
- Context menu can be displayed by clicking on the song name, artist, or star ratings. Within the context menu a user can perform the following:
- add current song to a playlist *note that recent playlists being added to will be added to the context menu
- Go to the song Album
- Show/Hide Lyrics (not shown in image)
- Go to Song Artist
- Rate song
- To always display play/pause button the player can be resized, more on this later. Simply hover over the top or bottom window edge and drag up/down respectively until you see the play button.
- Up Next is apparently limited by the player size. If the player were to be resized height wise, it would show more items. As a default Windows feature if you double click on the top or bottom edge the window will resize to fill vertically, thus displaying MORE Up Next items.
- The player can be resized to multiple sizes: FULL screen (double click the invisible title bar, mentioned below in how to close section), medium, tiny, etc..
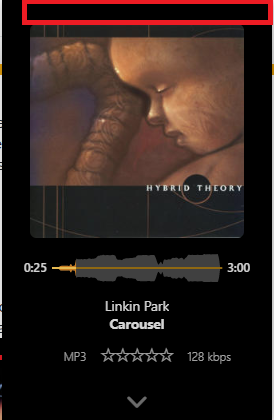
- On the desktop platforms, you can also use an extreme landscape format with a very narrow height:
(Although they cannot be used fully atm, because you cannot access the search or home page in that format.
But you could quickly drag the upper or lower border to make it larger temporarily for selecting the next mix, radio or artist and them make it smaller again.)


- Clicking/tapping the downward chevron doesn’t close the playback window, it merely minimizes it.
You can’t really ‘close’ the player window inside of Plexamp, except if you Stop playback. (which isn’t really necessary, because the full track is being cached far in advance. Thats why the difference between Pause/Stop is negligible).
If you absolutely must stop playback, use a long tap/click on the Pause button during playback. - The player can be closed from a Windows stand point by right clicking on the invisible “title bar” and selecting Close, or like any other open window by hovering over the taskbar icon and clicking the RED X (difficult to get this screen shot), or by focusing player window and pressing Alt+F4.
- Carousel scrolling - Certain sections/items are displayed as carousel cards that can be horizontal scrolled through. If using a mouse this can be done by pressing the mouse button that corresponds to horizontal scrolling. However, if this is not possible, place the mouse cursor over the edge of a carousel card (left or right) and a navigation button will become visible that can then be clicked to horizontal scroll through the carousel. Just like that it’s called magic
- Mixes for you Carousel
- Up Next Autoplay Carousel
- Mixes for you Carousel


Mobile
Long tapcan usually be used on the mobile platforms instead of aright-click.Long tapthe play button to “stop” playback and close Plexamp as opposed to pausing Plexamp and swipe closing.- On touch screen devices, you can change now playing track by swiping the player control area right to go back a track or left to go to the next track if available.
- On touch screen devices, you can change the visualizer by swiping it from its center to the left or right.
- On touch screen devices, you can see the play queue by swiping the player upwards.
Android Auto
-
Plexamp Icon will display on Android Auto as an available app.
Once selected the available navigational menus are:
Home, Library, Charts, Downloads
-
Home
-
Library - Navigating through the library can be done with the scroll bar on the left, scrolling the center menu via touch, or by selecting Search by letter.
Search by letter
-
Charts - Did someone say Aural Fixations?
-
Downloads - selecting a downloaded item will begin immediate playback. Selecting Play will shuffle all downloaded content.
-
Now Playing - During playback a star is available to select when a track is favorited, this will give the track a 5 five star rating. As playback occurs an orange progress bar for each track will encircle the play/pause button.
When navigating to a secondary app, Plexamp will minimize with available action buttons displayed at the bottom. Pressing the Plexamp icon will bring Pleamp to the forefront as the primary app again.
During playback with Plexamp at the forefront, navigating away from Now Playing within Plexamp will minimize Now Playing to a circle Icon on the right. This icon can be pressed to maximize Now Playing again.


Technical
- the yellow shape shown on the seekbar is not a “waveform”, but really the result of an analysis with the EBU R128 algorithm to determine the development of “loudness” over the runtime of the track.
With it, you can discern pretty well if the mastering was done during the “loudness war ” or before it.
(and, with some experience, also if the mastering was done post -loudness war )
) - Plexamp doesn’t do “cross-fading”. The word “fading” implies that the player will continually raise the volume at the start of a track and continually lower volume at the end of it.
Plex doesn’t do that.
Instead, the tracks are being analyzed how loudness is developing during their playtime. Then this information is used to determine how far the previous and its following track can be overlapped without the combined loudness of them getting too high.
Which means that every pair of tracks has a different, individually adapted overlapping time. If your previous track is slowly fading out and the next track is also very slowly building up, they can overlap quite long. If you have two tracks which are cut hard at their end/beginning respectively, you’ll get no overlap at all. - Deep media analysis - Newly added music is typically deep analyzed during PMS maintenance window. This setting can be found in the server settings:
settings > scheduled tasks > Perform extensive media analysis during maintenance. This scan is responsible for adding data that Plexamp can take advantage of; e.g. loudness to make the sound print visible, amongst other things. Media analysis can be triggered/forced via the command line against a single item or a full scan. Please note: A forced scan CANNOT BE ABORTED!! When performing a full scan a high load will instantly take place. RPi users be warned. The Plex Media Scanner is located with the other executables. The below commands are for single item scan, item value (album id, etc.) is to replace xxx. For more information please see the Plex Media Scanner via Command Line- Linux:
su - plex -c '/usr/lib/plexmediaserver/Plex\ Media\ Scanner --item xxx --analyze-loudness --force --log-file-suffix " Deep Analysis"' - MacOs:
/Applications/Plex Media Server.app/Contents/MacOS/Plex Media Scanner --item XXX --analyze-loudness --force --log-file-suffix " Deep Analysis" - Windows:
"C:\Program Files (x86)\Plex\Plex Media Server\Plex Media Scanner.exe" --item XXX --analyze-loudness --force --log-file-suffix " Deep Analysis"
- Linux:
I surely hope this helps others discover the awesome features Plexamp has. Thank you wholeheartedly to the Plex Team for this wonderful thing. it kicks the … alpaca’s ass.


 )
)