Welcome to Plex QNAP FAQ:
This post will try and answer some common questions related to the combination of QNAP and Plex Media Server
For more general Tips & Tricks, see this
First of all, we urge you to look @ our support site on the NAS Guide page
Questions:
- Q01: I installed the latest version, or?
- Q02: Which version do I need, Intel or Arm?
- Q03: You say Arm CPU, but is all Arm devices supported?
- Q04: Will my QNAP be powerful enough to support client X?
- Q05: How do I install a downloaded QPKG from Plex?
- Q06: Do I have to uninstall before installing a new version?
- Q07: How do a do a complete reinstall of Plex on my QNAP
- Q08: How do I find the installed version of Plex Media Server?
- Q09: How do I find out what model of QNAP I’m running?
- Q10: How do I find the QNAP firmware I’m running?
- Q11: Where is the Plex install directory
- Q12: How do I get to the logs directory?
- Q13: How do I connect to my QNAP with SSH?
- Q14: Where should I put my medias?
- Q15: Adding a plug-in from a Windows workstation
- Q16: I have a problem with plex.tv, where I can connect to it, but not the reverse
- Q17: My media are located on a remote NAS or something else, but regardless, I need to run some script during every restart of my QNAP
- Q18: Making it easy for the future
- Q19: Adding your own certificate to Plex Media Server
- Q20: Upgrading QTS from 32 bit to 64 bit
- Q21: I got more than one network interface on my QNAP
- Q22: Which IP Address should my QNAP have
- Q23: Can not claim Plex Media Server
- Q24: I have connected my QNAP to another router and now Plex clients can’t access it
- Q25: Quick access to the internal Library Directory
- Q26: How to restart PMS from commandline
- Q27: How to update PMS from commandline (SSH)
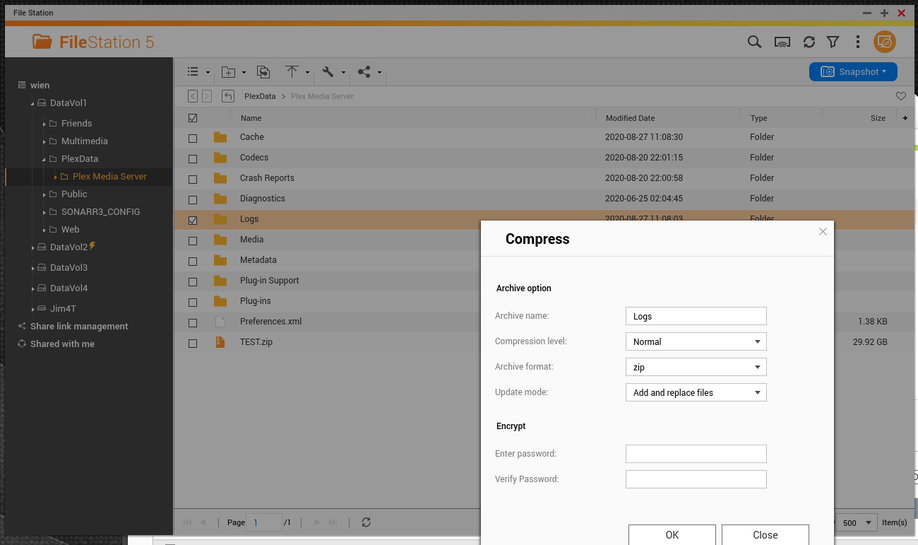
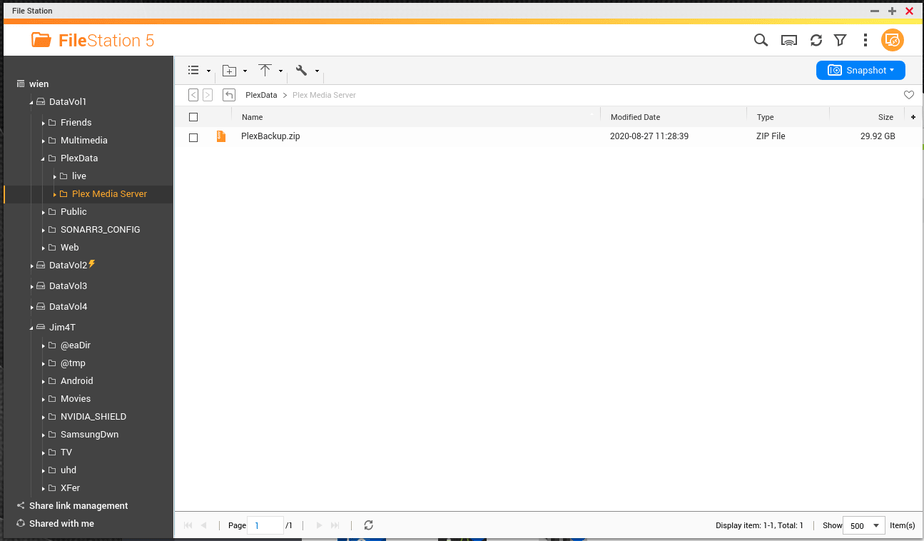
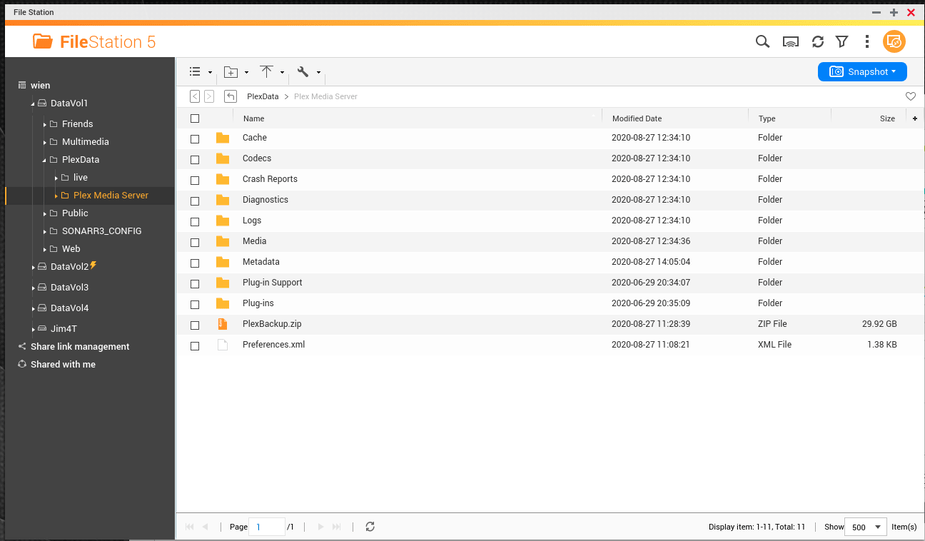
- Q28: How to use the PlexData share
- Q29: How to bypass iHD driver
- Q30: How to reclaim QNAP Plex server
- Q31: HW HDR Tone Mapping on QTS/QuTS
- Q32: (Re-)Claiming a QNAP based Plex Media Server
- Q33: Move PlexMediaServer to a different DataVol (volume)
- Announcement regarding QNAP MultiMedia Software
Q1: I installed the latest version, or?
If so, then make sure you didn’t do it from QNAP App-Center, since the version held on the QNAP App-Store is almost always behind the latest release
We suggest you visit http://plex.tv/download instead
Back to top
Q2: Which version do I need, Intel or Arm?
It all depends on the processor that your QNAP is running…If Intel or AMD, then go for the Intel one, but if ARM, go for the ARM one.
And to check what version you got, visit http://www.qnap.com/i/en/product/ and select your product. Then click on specifications, and look @ the top under CPU. Also note, that if running Intel, and using QTS 4.3 or above, that you need the 64bit version of PMS
Back to top
Q3: You say Arm CPU, but is all Arm devices supported?
Sadly no,
X-19 devices (most Marvel devices) are no longer developed, but still functional, and the last available version is V0.9.16.6.
X31 devices are fully supported, and developed.
X31Plus devices are fully supported, and developed.
Look here
Back to top
Q4: Will my QNAP be powerful enough to support client X?
Look here
And note, that different clients have different demands, so look up the specs for your client OS, since Plex relies on that. Without native OS support, the Plex Client has to depend on the Plex Server to transcode the media
Back to top
Q5: How do I install a downloaded QPKG from Plex?
When logging into QNAP Admin interface, select the QNAP App-Center, and then Manual install.
You can find a guide here, that shows how to install .qpkg’s manually.
Back to top
Q6: Do I have to uninstall before installing a new version?
Nope, and a bad idea…If you do so, all your information will be lost…Instead, and recommended, simply install on top of the old one
Back to top
Q7: How do I do a complete reinstall of Plex on my QNAP
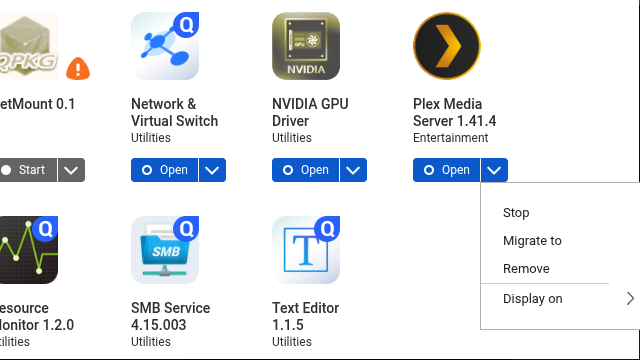
In QNAP Admin Interface, select the App-Center, and then hit more/remove. After it’s done, install again. (Note that all your Metadata etc. will be gone)
Back to top
Q8: How do I find the installed version of Plex Media Server?
Simply launch the QNAP admin interface, and look in the App Center. It’s written on the icon for Plex
Back to top
Q9: How do I find out what model of QNAP I’m running?
QNAP Admin Interface. Select “Control Panel”/“System Information”. Look @ the summary page
Back to top
Q10: How do I find the QNAP firmware I’m running?
Same as above
Back to top
Q11: Where is the Plex install directory
Since this depends on your harddrive setup, do this:
Connect to the console of QNAP (SSH, look below), and type:
getcfg -f /etc/config/qpkg.conf PlexMediaServer Install_path
Back to top
Q12: How do I get to the logs directory?
Look at the Q11 above, and to the path returned, add /Library/Plex Media Server/Logs
To access it, use either SSH if on some kinda Linux, or WinSCP/Putty if on Windows.
( Hint…Also look @ Q18 as well as the easy on here: Q25
Back to top
Q13: How do I connect to my QNAP with SSH?
Depends on your OS:
- Windows older than V10→ Use Putty.exe
- Mac and Linux & Windows 10 and above→ In a terminal, type ssh admin@“INSERT IP ADDRESS OF QNAP”
Back to top
Q14: Where should I put my medias?
It’s not important, as long as you DO NOT use the default shares from QNAP, like “Multimedia” etc, since they also are used with some QNAP bundled applications, that creates files and directories, that confuse the Plex scanners. If you however decide to go with that directory, we urge you to look for hidden directories and files in it, and add an exclusion for those by using PlexIgnore functionallity.
And to create a shared folder just for Plex Medias, follow this guide and remember to grant full rights to your self, so you can add new items there.
Back to top
Q15: Adding a plug-in from a Windows workstation
If running WinSCP then make sure that you have enabled to show hidden files and folders (Ctrl-Alt-H). Also make sure, that you connect using SFTP!
Then the path should be like what’s found in Q11, but add the following to the path: “/Library/Plex Media Server/Plug-ins”
After adding a plug-in, you’ll have to disable/enable your PMS from the QNAP Web-Interface
As an alternative, you could also install this one, which create an admin Share on your QNAP, pointing to the Library directory
Q16: I have a problem with plex.tv, where I can connect to it, but not the reverse,
First of all, you need to make sure, that port forwarding is enabled on your router/firewall. See Troubleshooting Remote Access
Also make sure, that jumbo frames is not enabled, since this would break plex.tv communications. It must be set to 1500
Back to top
Q17: My media are located on a remote NAS or something else, but regardless, I need to run some script during every restart of my QNAP
This is a bit more complicated, if not used to Linux, so here’s the guide:
- Log into your QNAP device using SSH or Telnet, and if on Windows use WinSCP ( See Q15)
- Create a directory named : /share/MD0_DATA/.qpkg/autorun
** (Note that MD0_DATA might have to be replaced with something else…See Q11, and look in the path returned) - Now we need to edit the file controlling all the installed QPKG’s
- Edit the file named: /etc/config/qpkg.conf (Use WinSCP if on Windows, or VI if in an SSH
Add the following:
[autorun]
Name = autorun
Version = 0.1
Author = Plex Community
Date = 2015-06-09
Shell = /share/MD0_DATA/.qpkg/autorun/autorun.sh
Install_Path = /share/MD0_DATA/.qpkg/autorun
Enable = TRUE
(And in above, again might have to replace “MD0_DATA” with something like “CACHEDEV1_DATA”
- Now create a file named: /share/MD0_DATA/.qpkg/autorun/autorun.sh
Make sure, that the first line in this file is: #!/bin/sh
Make sure, that the autorun.sh file just created, has executable rights:
In WinSCP, right-click and select properties
In SSH:
chmod +x /share/MD0_DATA/.qpkg/autorun/autorun.sh
Now add the rest of your script after the first line to the autorun.sh file
Reboot and test
Back to top
Q18: Making it easy for the future
If you want fast access to like logs and plugin’s directory in the future, then it might be a good idea to create a share for this, so in the QNAP admin interface, select the shared folders
To do it the easy way, look here
To do it manually, read ahead:
In QTS Control Panel, select Privilege - Shared Folder

Then create a new share, by pressing the Create button
Enter a valid name, like Plex Internal Library and in the field named “Enter Path Manually”, enter the path from Q11
Back to top
Q19: Adding your own certificate to Plex Media Server
This answer comes from the gifted @bcjenkins that wrote up a howto, with screenshots and everything.
You can find it here:
QTS4.2 and before
QTS4.3
Thanks mate for this
Back to top
Q20: Upgrading QTS from 32 bit to 64 bit
If your QNAP is going to be upgraded from QTS 4.2.x towards QTS 4.3.x, then note the following:
-
Do NOT reformat the drives. It’s a simple upgrade
-
Do NOT uninstall the existing version of PMS. Doing so will make you lose all metadata, users and so on
-
Upgrade QTS on to of the old one, and reboot
-
After the reboot, PMS will fail, since the old 32 bit version can’t run on a 64 bit OS, but ignore that
-
Download and install the 64 bit version of PMS from Plex
-
Install on top of the old one
-
Done
On rare occasions QTS upgrade changes file/folder permissions used by PMS, and PMS becomes unusable. On such cases: -
Identify the path where Plex libraries are installed (see Q11)
-
Stop PMS and reboot the NAS
-
take a backup of
/share/CACHEDEV1_DATA/.qpkg/PlexMediaServer/Library/Plex Media Server(supposing that/share/CACHEDEV1_DATA/.qpkg/PlexMediaServeris the path obtained previously). Optionally delete thePlug-in Supportsub-folder (sometimes it gets corrupted too) but in this case you will have to reparametrize Agents -
Remove Plex Media Server and delete the
/share/CACHEDEV1_DATA/.qpkg/PlexMediaServerfolder manually -
install PMS manually using PlexMediaServer_1.7.5.4035-313f93718_x86_64.qpkg (or later)
-
Stop PMS and replace the newly created
/share/CACHEDEV1_DATA/.qpkg/PlexMediaServer/Library/Plex Media Serverfolder by your backup
Back to top
Q21: I got more than one network interface on my QNAP
If your QNAP is equipped with more than one Network Interface you can use more than one if, and only if, you enable trunking.
- If you have a switch in front of it supporting LACP/802.3ad → Read here for more info
- If your switch does not supports LACP then you can enable port trunking with
balance-alborbalance-tlb
If simply adding a second interface, and assigning a separate IP address to that, you will run into problems sooner or later.
Back to top
Q22: Which IP Address should my QNAP have
Servers need fixed (or reserved) IP addresses. To avoid a clash with any other server on the internet, you MUST use what is known as Private Address Space. According to RFC 1918 these are:
10.0.0.0 – 10.255.255.255
172.16.0.0 – 172.31.255.255
192.168.0.0 – 192.168.255.255
You will not be able to perform initial parametrization if you use another IP range because PMS “thinks” that you are trying to access remotely, therefore disabling initial setup.
Back to top
Q23: Can not claim Plex Media Server
If this is a first install, and after the install, you click on the Plex icon in the QNAP App-Center, in order to open the Plex Media Sever (PMS) page, you will fail due to the fact, that it tries to access PMS using the secure HTTPS protocol.
Sadly, unless claimed, PMS will only respond to pure HTTP calls, until claimed, and as such, simply remove the s from https://...
After claiming the PMS, all will work nicely
Back to top
Q24: I have connected my QNAP to another router and now Plex clients can’t access it
When you connect your QNAP to another router (your ISP supplied a new one, you have acquired a new router, etc.), please review the IP parameters of QNAP’s network interfaces. Replacing routers often implies that LAN now uses a different IP range, and when you use fixed IP’s for QNAP (as you should), you may have to change not only its IP address, but also its gateway and DNS. Failure to do so may lead to impredictable results.
If you are “cascading” routers (connecting QNAP to the LAN port of a router whose WAN port is connected to the LAN port of another router) you may have created a double-NAT situation, and in this case it’s necessary to make a non-trivial setup to activate remote connections.
Back to top
Q25: Quick access to the internal Library Directory
If you want a quick way to access the internal Plex Library directory, where logs reside, as well as 3.Party tools/plugins can be installed in, look here: https://forums.plex.tv/t/160211
Back to top
Q26: How to restart PMS from commandline
Type the following in an SSH command prompt:
/etc/init.d/plex.sh restart
Back to top
Q27: How to update PMS from commandline (SSH)
Please take a look at this trick
Back to top
If you have some additions to this FAQ, feel free to PM either me, or some other Ninja, and we’ll look into it
Best Regards
The Ninja Team